
Hey, hey 👋🏻 We are getting excited for Halloween in my house, or trick-or-treating to be exact! To help set the mood, I created this quirky little cemetery scene, set in a Tim Holtz framed panel.

I had such fun making this, and there are a lot of details I’m excited to share, so grab some coffee and settle in and off we go!
The Background…
First, I cut some cobwebs out of heavystock from the Spider Web die set and glued down on the base of the framed panel with collage medium. Then I painted both my base and frame piece with Black Soot Distress paint. I love that the base and frame are separate so I can ‘sandwich’ my other layers between them!

Next, I used my finger to apply Sizzix Rose Gold luster wax to the base and frame, highlighting all the yummy texture. (I ended up covering the sides later, so didn’t need to paint/highlight the edges at all 🤷🏻♀️)

I used quote chips to elevate the top half of the frame because I knew I wanted my hills to be extra chunky at the bottom and I wanted to try to keep the frame (somewhat) parallel to the base 🤷🏻♀️

Next, I inked 4 larger hardware heads with Caramel and glued in each corner of the frame. Then I added translucent grit paste around the hardware (to me, this helps ‘unite’ them with the frame so they look less like separate elements). Once the paste is fully dry, I inked over it with Caramel. I usually like 2 coats of ink for a deeper, rustier look.
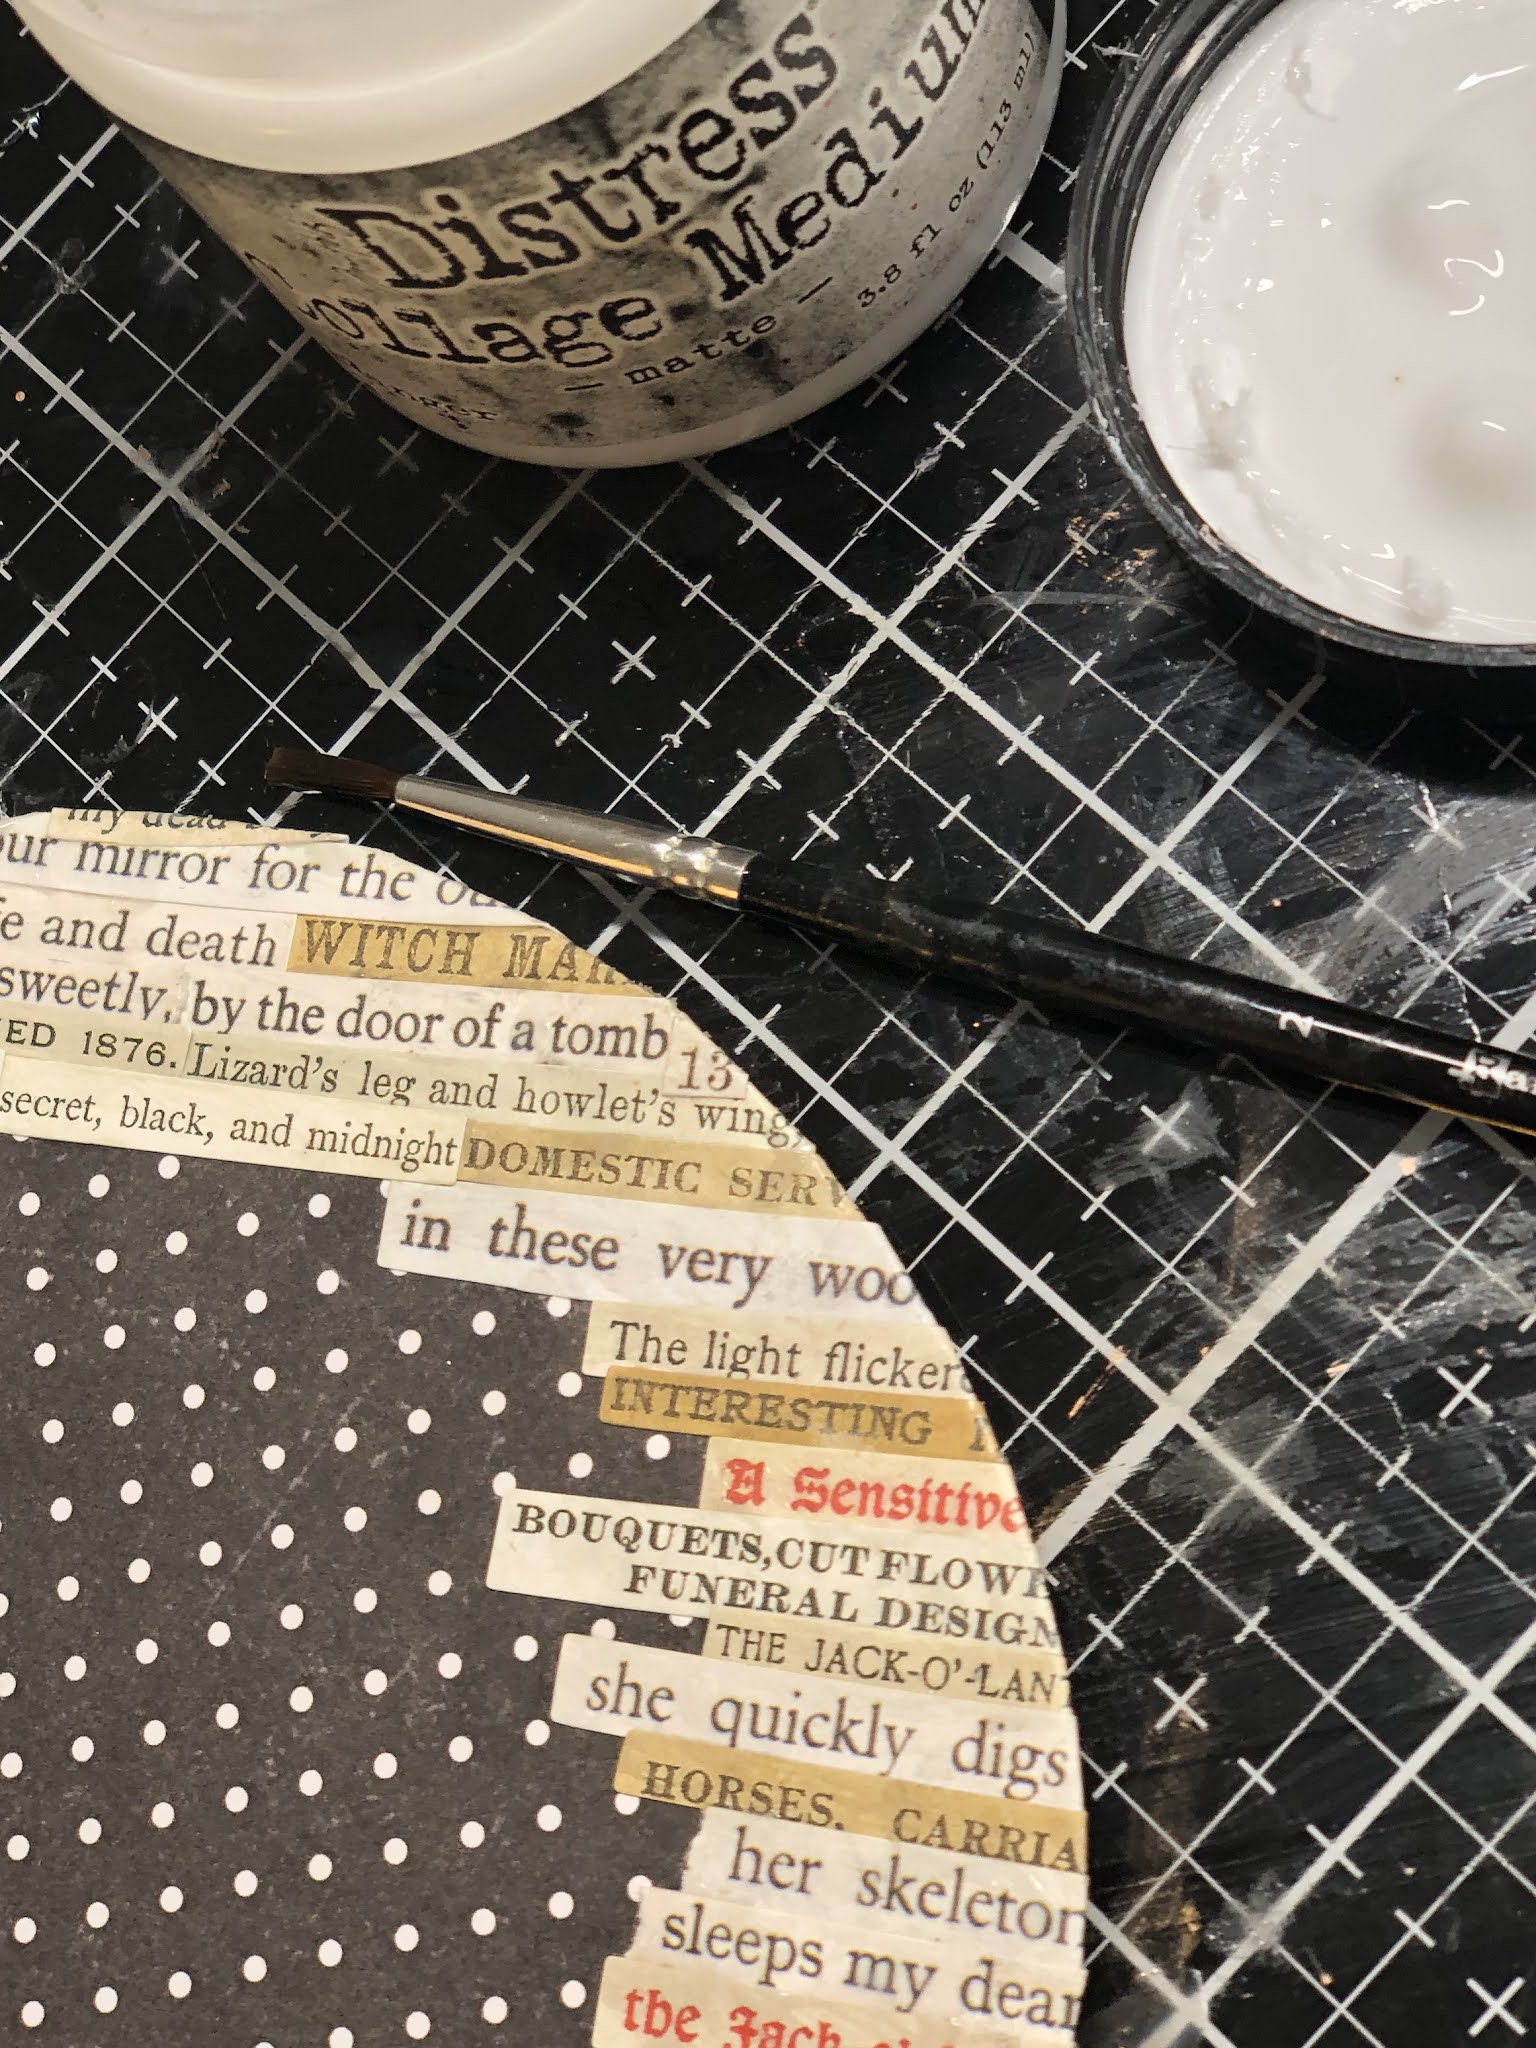
For my inner text border, I took clippings from the Curiosities sticker book, placed them side-by-side on strips of heavystock, sealed with collage medium, lightly rubbed Rose Gold wax over the top and front edge with my finger, and positioned them in place underneath my main frame.

The “Hallowed Ground” Pieces…
I’m loving the way these Hallowed Ground strips turned out. First, I cut 2 strips of white heavystock paper, exactly the height of the Mini Marquee Letters, and used my finger to cover them with rose gold wax.
Then I spelled out Hallowed Ground, glued my letters side by side and trimmed the length of my strips, leaving room on the sides for hardware.


Once the Glossy Accents was fully dry, I inked 6 small hardware heads and glued to the corners of each strip and added translucent grit paste around their bases (I didn’t do any for the right side of Ground, I knew that part of the strip would be hidden.) Then I used Caramel alcohol ink to ‘rust up’ the grit paste and add some extra grunge to the edges of my strips.💥

I wanted the right edge of the Hallowed strip to rest on the frame, so I needed to elevate the left side to make it parallel to the base… So, I inked 2 hitch fasteners with caramel and glued under the hardware heads (love those dang hitch fasteners!)
I found the ‘Toxique’ chip piece in the Halloween baseboard pack, added grit paste to the edges, then inked with Caramel and highlighted with Rose Gold wax.

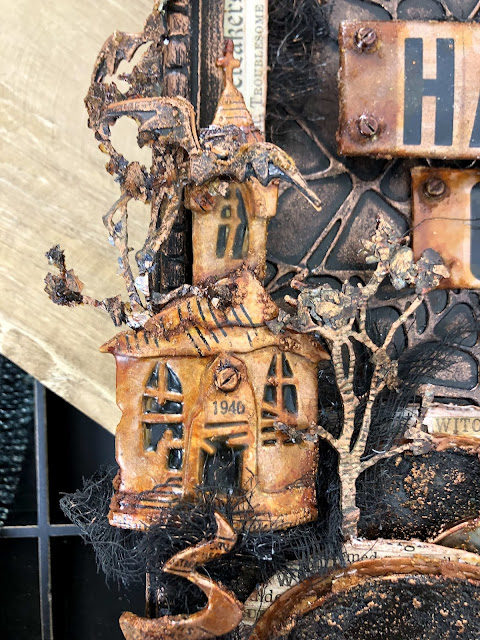
The Church + Graves…
Ahh, the church. Must confess I did some trial and error on this piece. I’ll show you how I made my final version, then compare to my ‘experimental’ versions and you can decide if it was worth the redos 🤦🏻♀️
I started by cutting 6 church pieces from the Ghosttown die set, then glued 2 layers together, which left me with 3 thicker churches. One is my base, the others will get cut up for detailing.

I sketched out my plan for the other layers and then fussy cut (so fun! and forgiving… all the layers of medium to follow help smooth or cover any cutting imperfections). I also try to stick with the ‘style’ of the die. I glued the layers in place and painted thoroughly with Antiqued Bronze stain.


Next, I decided to add a few remnant rubs for extra detail. I only had the Special Delivery set on hand, so I tried to make that one work. Not sure if I would do this step on my church again, but I do ❤️ remnant rubs!


Then I added some marquee letters behind the windows and coated the whole piece with a thick layer of Glossy Accents. (I liked the idea of not totally blacked out windows, but this detail is tricky to see once the Glossy Accents dries 🤷🏻♀️)


Once the gloss coat was dry, I added a caramel-inked hardware head over the door, a bit of grit paste, followed by caramel ink over the gritty bits. Below you can see through the windows a bit better.

I also cut 3 of the ‘smoke’ pieces from the Ghosttown set to use for my path and 3 gravestone cuts from Ghosttown 2, glued the layers together and gave them the same grungy treatment as my church.
Here are my ‘matching’ elements at this stage:

Ok, so that’s how I made church #3, now I’ll show you my rejects and explain why I was unhappy with them… ✨
Below is my first attempt. I thought I wanted it black, but realized it needed more contrast with my background, so I started again…

Here’s #2… it was almost a keeper, but no cigar. I was really digging it, but then I messed up by adding a layer of caramel ink before adding glossy accents so it was much darker than my marquee letter strips 🙄

Below you can see my final version (pre-alcohol ink over the grit paste) next to version 2. I like it a lot better and feel it was worth the extra time! (You do you, boo! 😎)

The Hills…
For the hills, I used Stitched Ovals of various sizes, cut from heavystock. For the gritty black part, I covered them liberally with grit paste, then painted with Black Soot and added antique bronze stain highlights.
To help provide contrast for my black ovals, I cut another set of ovals from heavystock and covered with antiqued bronze stain and glued slightly offset behind the black ones. Then I added more grit paste between them to give them some unity and colored the grit paste with caramel ink. Super grungy 😍

Love the way these turned out, but because I like to complicate things, I decided I needed even more contrast with my background. so I cut another set of ovals from heavystock and covered them with Curiosities clippings, similar to my inner frame.

I sealed my clippings with collage medium, distressed the edges, added Rose Gold Wax and glued slightly offset from my other oval pieces.
Some of the other elements I used to add interest to my hills…
Gear… From the Mechanical Bigz set, cut from thicker mat board. I added grit paste, painted with black soot, applied rose gold wax highlights to the grit, and finished with touches of caramel ink.
Ephemera… the ‘Condemned’ tag, the ticket, and the circle piece over the gear came from the Halloween ephemera pack. The 31 chip is a piece of paper with glossy Accents over the top. Lucky 13 pin from the Halloween flair pack.

Optical lens… I first gave it a coat of caramel alcohol ink, then added grit paste, then applied Rose gold wax over the gritty bits, and then more caramel ink.
Metal ruler… From the Odds and Ends Embellishments set. I covered with caramel ink, then added some grit paste, then more caramel ink over the grit.

The Trees…
These trees make me happy 🙊 I cut 6 trees from the Ghost town set, spritzed with water and ran through Tim’s Woodgrain 3D embossing folder, several good passes to really get that nice texture.
Coated with ground espresso paint. Then used my finger to highlight the texture with rose gold luster wax.


Once dry, I added drops of caramel ink onto the flakes, avoiding the tree trunks.

Once the ink had dried, I added Rose Gold luster wax highlights.

Cuuuute 🙊

The Bats…
To make my bats, I cut out 2 of the largest bats from Bat Crazy, then fussy cut some extra detail on one of the pieces before gluing it on top of the other piece. I Added grit paste, Painted with black Soot all over, then touches of rose gold wax highlights, followed by caramel ink.


I didn’t think plain black bats would contrast enough with the background, so I cut another piece for my ‘highlight’ layer, coated with antiqued bronze stain and glued slightly offset below the black piece.

Then added grit paste followed by caramel ink, and shaped the wings and body. Used these steps for 5 more bats of various sizes. For the largest one, I thought it’d be cool to go for some extra elevation, so I tinted a vignette box hardware nail with caramel ink and poked through the bat. As part of my finishing touches at the end, I hammered the nail into my background and secured with Glossy Accents at the base to keep it elevated.

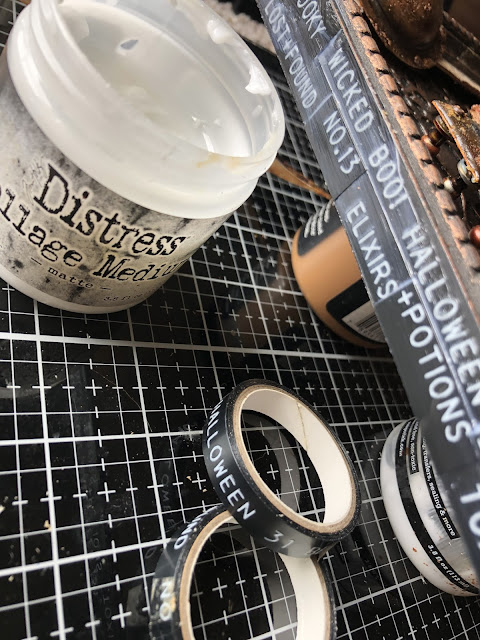
Now, I’m ready for assembly. Obviously, I like to make most of my elements independently, so then it comes down to just gluing them all in place together. I use Distress Collage Medium for my adhesive… and A LOT of clamping.
The Edges + Hanger…
Once my scene was fully glued and dry, it was time to fix up the edges.


I started to wrap the edges with black Halloween label tape (the back is very sticky but I still stuck it down with collage medium for good measure).


Then I added touches of rose gold wax to the white lettering to grunge it up before sealing with Collage medium, then applied grit paste randomly.

Once the paste was dry, I colored with caramel ink.
The Moon + Finishing Touches…
I loved the idea of using the drawer pull as a moon, so I first inked it with Caramel alcohol ink, along with two little studs from hardware heads. I added some grit paste, highlighted with rose gold wax, then more caramel ink. I glued the studs on first, then glued it in place on the frame (I like the spider web under it 🕸)

Next, I stained some cheesecloth with black soot and added little bits here and there around my scene. I also added more grit paste around the edges and corners of my frame, followed by caramel alcohol ink.

And that’s my grungy, quirky church graveyard scene 🪦⛪️ Whew!
Thanks so much for looking! ❤️ And Happy Halloween 🎃
x Erin
The Products…
Dies… Spider Web, Bat Crazy, Ghosttown, Ghosttown 2, Stitched Ovals, Mechanical Bigz
3D Embossing folder… Lumber
Surfaces… framed panel, Distress white heavystock
Mediums… collage medium, Distress grit paste, Rose Gold Luster Wax, Distress midnight mica flakes, Glossy Accents
Distress paint… Black Soot, Ground Espresso
Distress stain… Antiqued Bronze, Black Soot
Alcohol ink… Caramel
Ideaology… hardware heads, mini hardware pulls, Halloween baseboards, optical lens, type chips, vignette hardware, Tiny Clips, Hitch Fasteners, Curiosities sticker book, Halloween Label Tape, Odds and Ends Embellishments, Halloween Ephemera, Halloween flair
Other supplies… Big Shot, glass mat, Distress sprayer, heat tool, Cheesecloth