Showing posts with label fall. Show all posts

Monday, October 28, 2024

Fall At Last framed hanger 🍂

Hi again! I’m always so happy for fall every year — school’s back, the weather is gorgy-porgy after the summer heat, it’s football time again — so I thought I’d create a crackly little fall decor piece, inspired by the leaves and pumpkins in my area these days 🍁 the best!


Let me take you through a few more details about how I created this hanger ⤵️


The Background…

Started with a mini framed panel, Ran mixed media heavystock through the Cracked 3D embossing folder, glued down on the panel and painted with Scorched Timber


Next, used Antiqued Linen paint to go over the raised texture with my finger, followed by a thin watery wash of Caramel alcohol ink


Also cut a few embossed strips for the sides of the panel


 For the top hanger, I assembled a few jump rings, hook chains (minus the hooks) and screw eyes


The Pumpkins…

Cut from the colorize Pumpkin Duo, glued all layers together and painted with Antique linen + Scorched Timber stems


Added a top coat of clear crackle, then once it was dry, I rubbed on some scorched timber and rusty hinge distress crayon into the cracks and layer grooves


The Leaves…

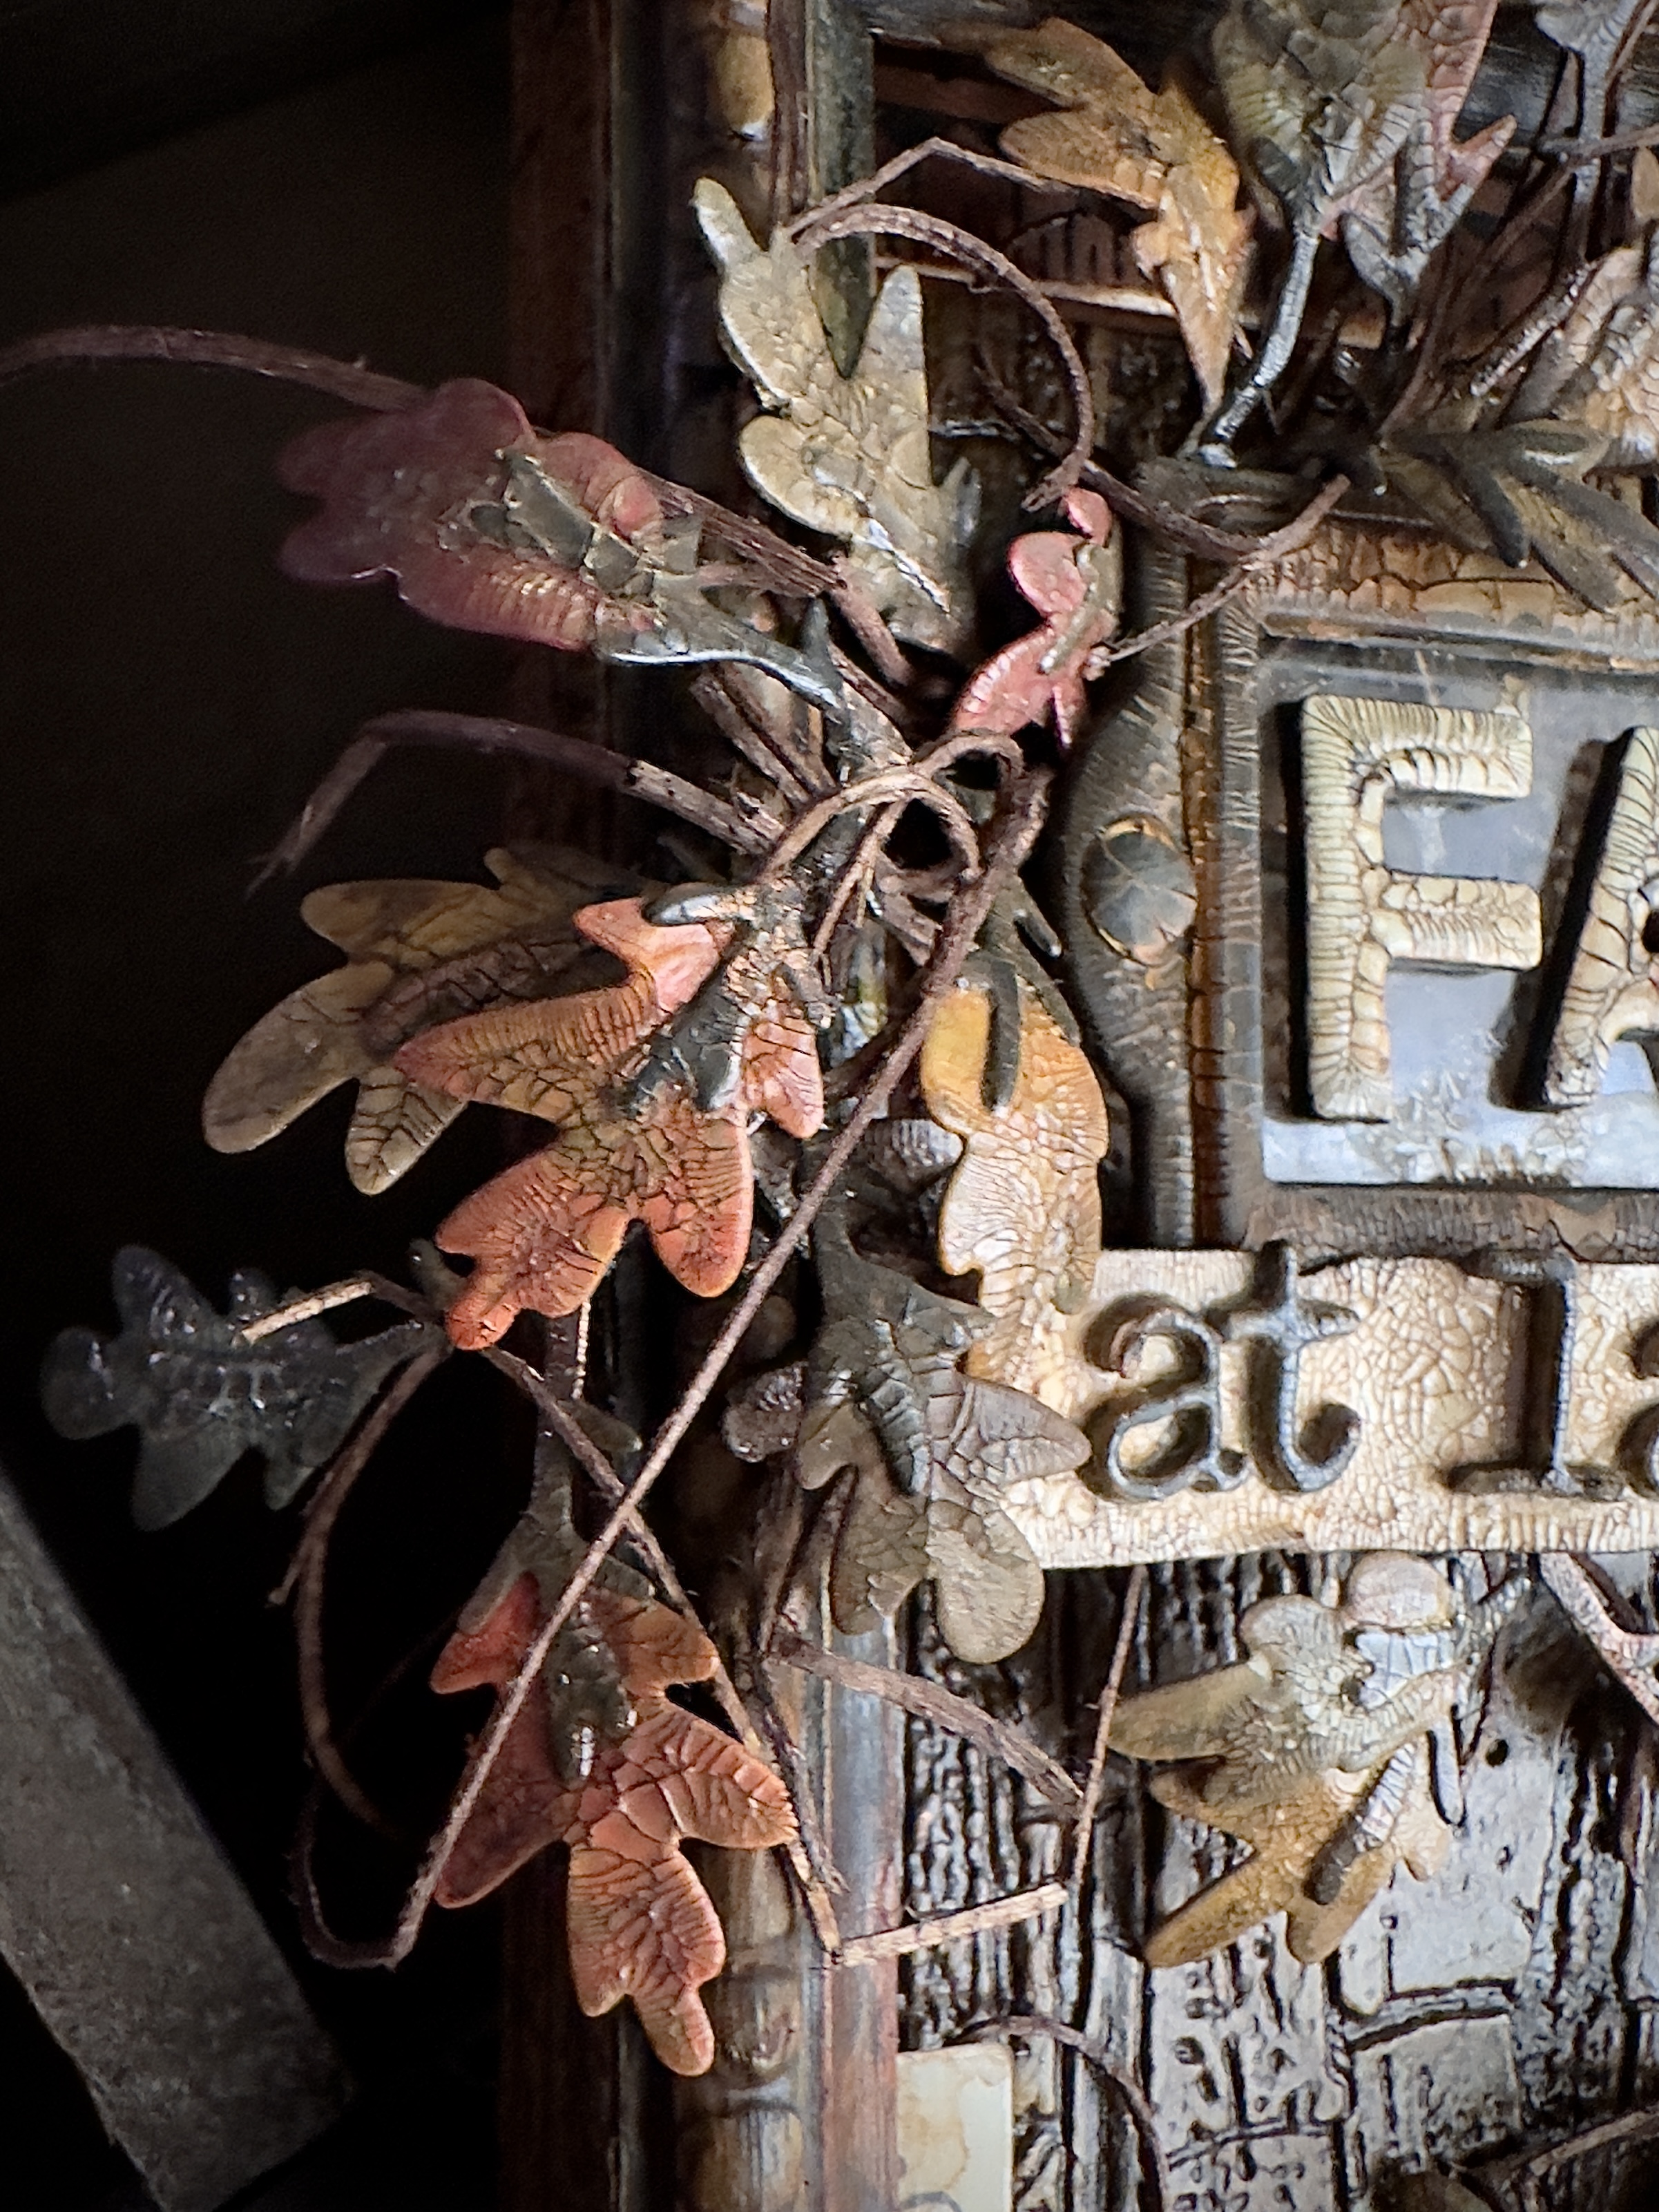
Cut a bunch of leaves from the Funky Foliage die set

Painted branches with scorched timber, leaves with different reds and oranges and greens (Forest Moss, Rustic Wilderness)


Glued the leaves on the branches and coated all with clear crackle

Once dry, added Scorched Timber crayon on top with a brush, then wiped away the extra with a paper towel

The “FALL” Frame + “At Last” Banner…

Painted the small Ideaology frame (I forget what set this is from) with scorched timber to match the rest, then caramel ink

Next, I added mounting dots before cutting a piece of clear acetate to size and gluing behind the frame


Then coated with clear crackle…


Cut FALL letters from the Bold die set, painted with Antiqued Linen, then a coat of clear crackle, then scorched timber crayon, wipe away extra, painted letter edges with scorched timber to give extra definition

The banner is from the Tattered Banners set (folded on the one side to shorten it up), painted with Antique linen and Scorched Timber edges

The “at last” letters are from the Tiny type lower set, painted with Scorched timber and glued down on the banner, then all coated with a thin layer of clear crackle


The Finishing Touches…

Inked a couple of wooden rulers and added to the top and bottom of my panel

Then glued down the small frame, banner, pumpkins (with leaves) + a few other Ideaology bits before adding excelsior shavings (inked with walnut stain) and tucking in the foliage


Ok, well that is my project, thanks so much for stopping by! Hope you are enjoying this fall season and are able to cozy up with loved ones☺️🧣🍁

Happy crafting! x Erin


The Products…

Surfaces… mini Framed Panel, mixed media heavystock

Dies… Colorize Pumkin Duo, Funky Foliage, Tiny Type lower, Alphanumeric Bold, Tattered Banners

3D Embossing Folders… Cracked

Distress Mediums… rock Candy clear crackle, collage matte 

Distress Paint… Scorched Timber, Antiqued Linen, Forest Moss, Rustic Wilderness

Distress Crayon… Scorched Timber, Rusty Hinge

Alcohol Ink… Caramel

Ideaology… small frame, mini key, eye hooks + chains, hardware heads, clock face, flare pin

Other… mounting dots, excelsior shavings, Big Shot, glass mat, heat gun

Friday, September 17, 2021

Autumn Splendor Tray

Hey there! It’s been a bit cooler here the last few weeks, so it felt fitting to create a little fall scene featuring the fabulous Tim Holtz Funky Foliage dies.


Let me go through some details about my process for this project! 🍂 🍄


The Tray…

Started off by applying texture paste through the Tim Holtz Script Layering Stencil (THS149) onto my medium vignette tray. I used a palette knife and actually ended up cutting the edges off my stencil to get in all the nooks and crannies a bit better (you do what you gotta do 🤷🏻‍♀️). After the stenciling was dry, I also added a bit of texture crackle paste here and there, then coated the whole tray with a layer of Picket Fence distress paint, followed by a Walnut Stain distress stain wash to highlight the stenciling.


Next, I added a few bits of numbered ephemera and moss. Then used caramel to ink up a few hardware heads and a mini drawer pull before adhering to the tray corners and top edge with collage medium.


The Foliage + Fungi…

I LOVE the whole Funky line of dies but the Foliage set might just top the list! I cut several of each piece out of heavy stock paper, then glued 2 layers together for extra thickness. I painted them with a bunch of different distress paints, including the edges (this part is a bit time-consuming, but I find it so relaxing!). 

Once the paint was dry, I applied a coat of rock candy clear crackle to all my pieces, then rubbed Walnut Stain distress crayon into the cracks.


The Centerpiece + Sentiment…

For my center shape, I used the Tim Holtz Trinket Frames Bigz die, cut 3 pieces out of chip board, and glued together. I painted with seedless preserves distress paint and then added a thick layer of clear crackle over the top. (Some of it chipped off in a few spots but I actually really love that!) I rubbed walnut stain crayon into the cracks, added a couple hardware heads, and then sealed the whole piece with collage medium.

For my words, Autumn Splendor, I used the Tiny Type Upper set to cut 2 of each of my letters out of heavystock paper, then glued them together. I glued them onto my shape and sealed again with a coat of collage medium. (I didn’t paint them, I like the ‘heavystock’ color 😜 but in the final stages, I did add some caramel alcohol ink to the bottom edges for a bit of extra oomph)

I added a few scrap pieces of pinked trim under my centerpiece to give it some extra lift so I could tuck in my moss and leaves around the edges.


The Finishing Touches…

Now I just needed to glue all of my foliage around my centerpiece! I made sure to add in plenty of moss too to help hold everything and add dimension.

Once everything was glued down, I went back through and added extra caramel ink to my hardware and letters for grunginess/rustiness and tucked in some bits of excelsior.

And that’s it, my funky little fall tray is complete! Thanks so much for looking and happy crafting!

x Erin


The Products…

Stencils… Script (THS149)

Dies… Funky Foliage, Trinket Frames, Tiny Type Upper

Surfaces… heavystock paper

Mediums… distress texture paste, texture crackle paste, collage medium, rock candy clear crackle

Distress crayon… Walnut Stain

Distress stain… Walnut stain

Alcohol ink… caramel

Distress Paint… picket fence, walnut stain, vintage photo, aged Mahogany, fired brick, rusty hinge, spiced marmalade, wild honey, fossilized amber, forest moss, peeled paint, seedless preserves

Ideaology…  vignette trayruler pieces, mini hardware handle, hardware heads

Etcetera… pinked trim

Other Supplies… numbered ephemera, moss, excelsior, Big Shot, palette knife, glass mat