Hello! 👋🏻 Popping in to share this starry little mixed media piece I’ve been working on, “starring” 🙃 the Tim Holtz Dimensional Star dies and Star Trims 3D embossing strips. I loved watching the Olympics this summer and felt inspired to make a little something to mark the occasion 🇫🇷👩🏻🎨


Here’s a bit more detail about how this project came together 👇🏻
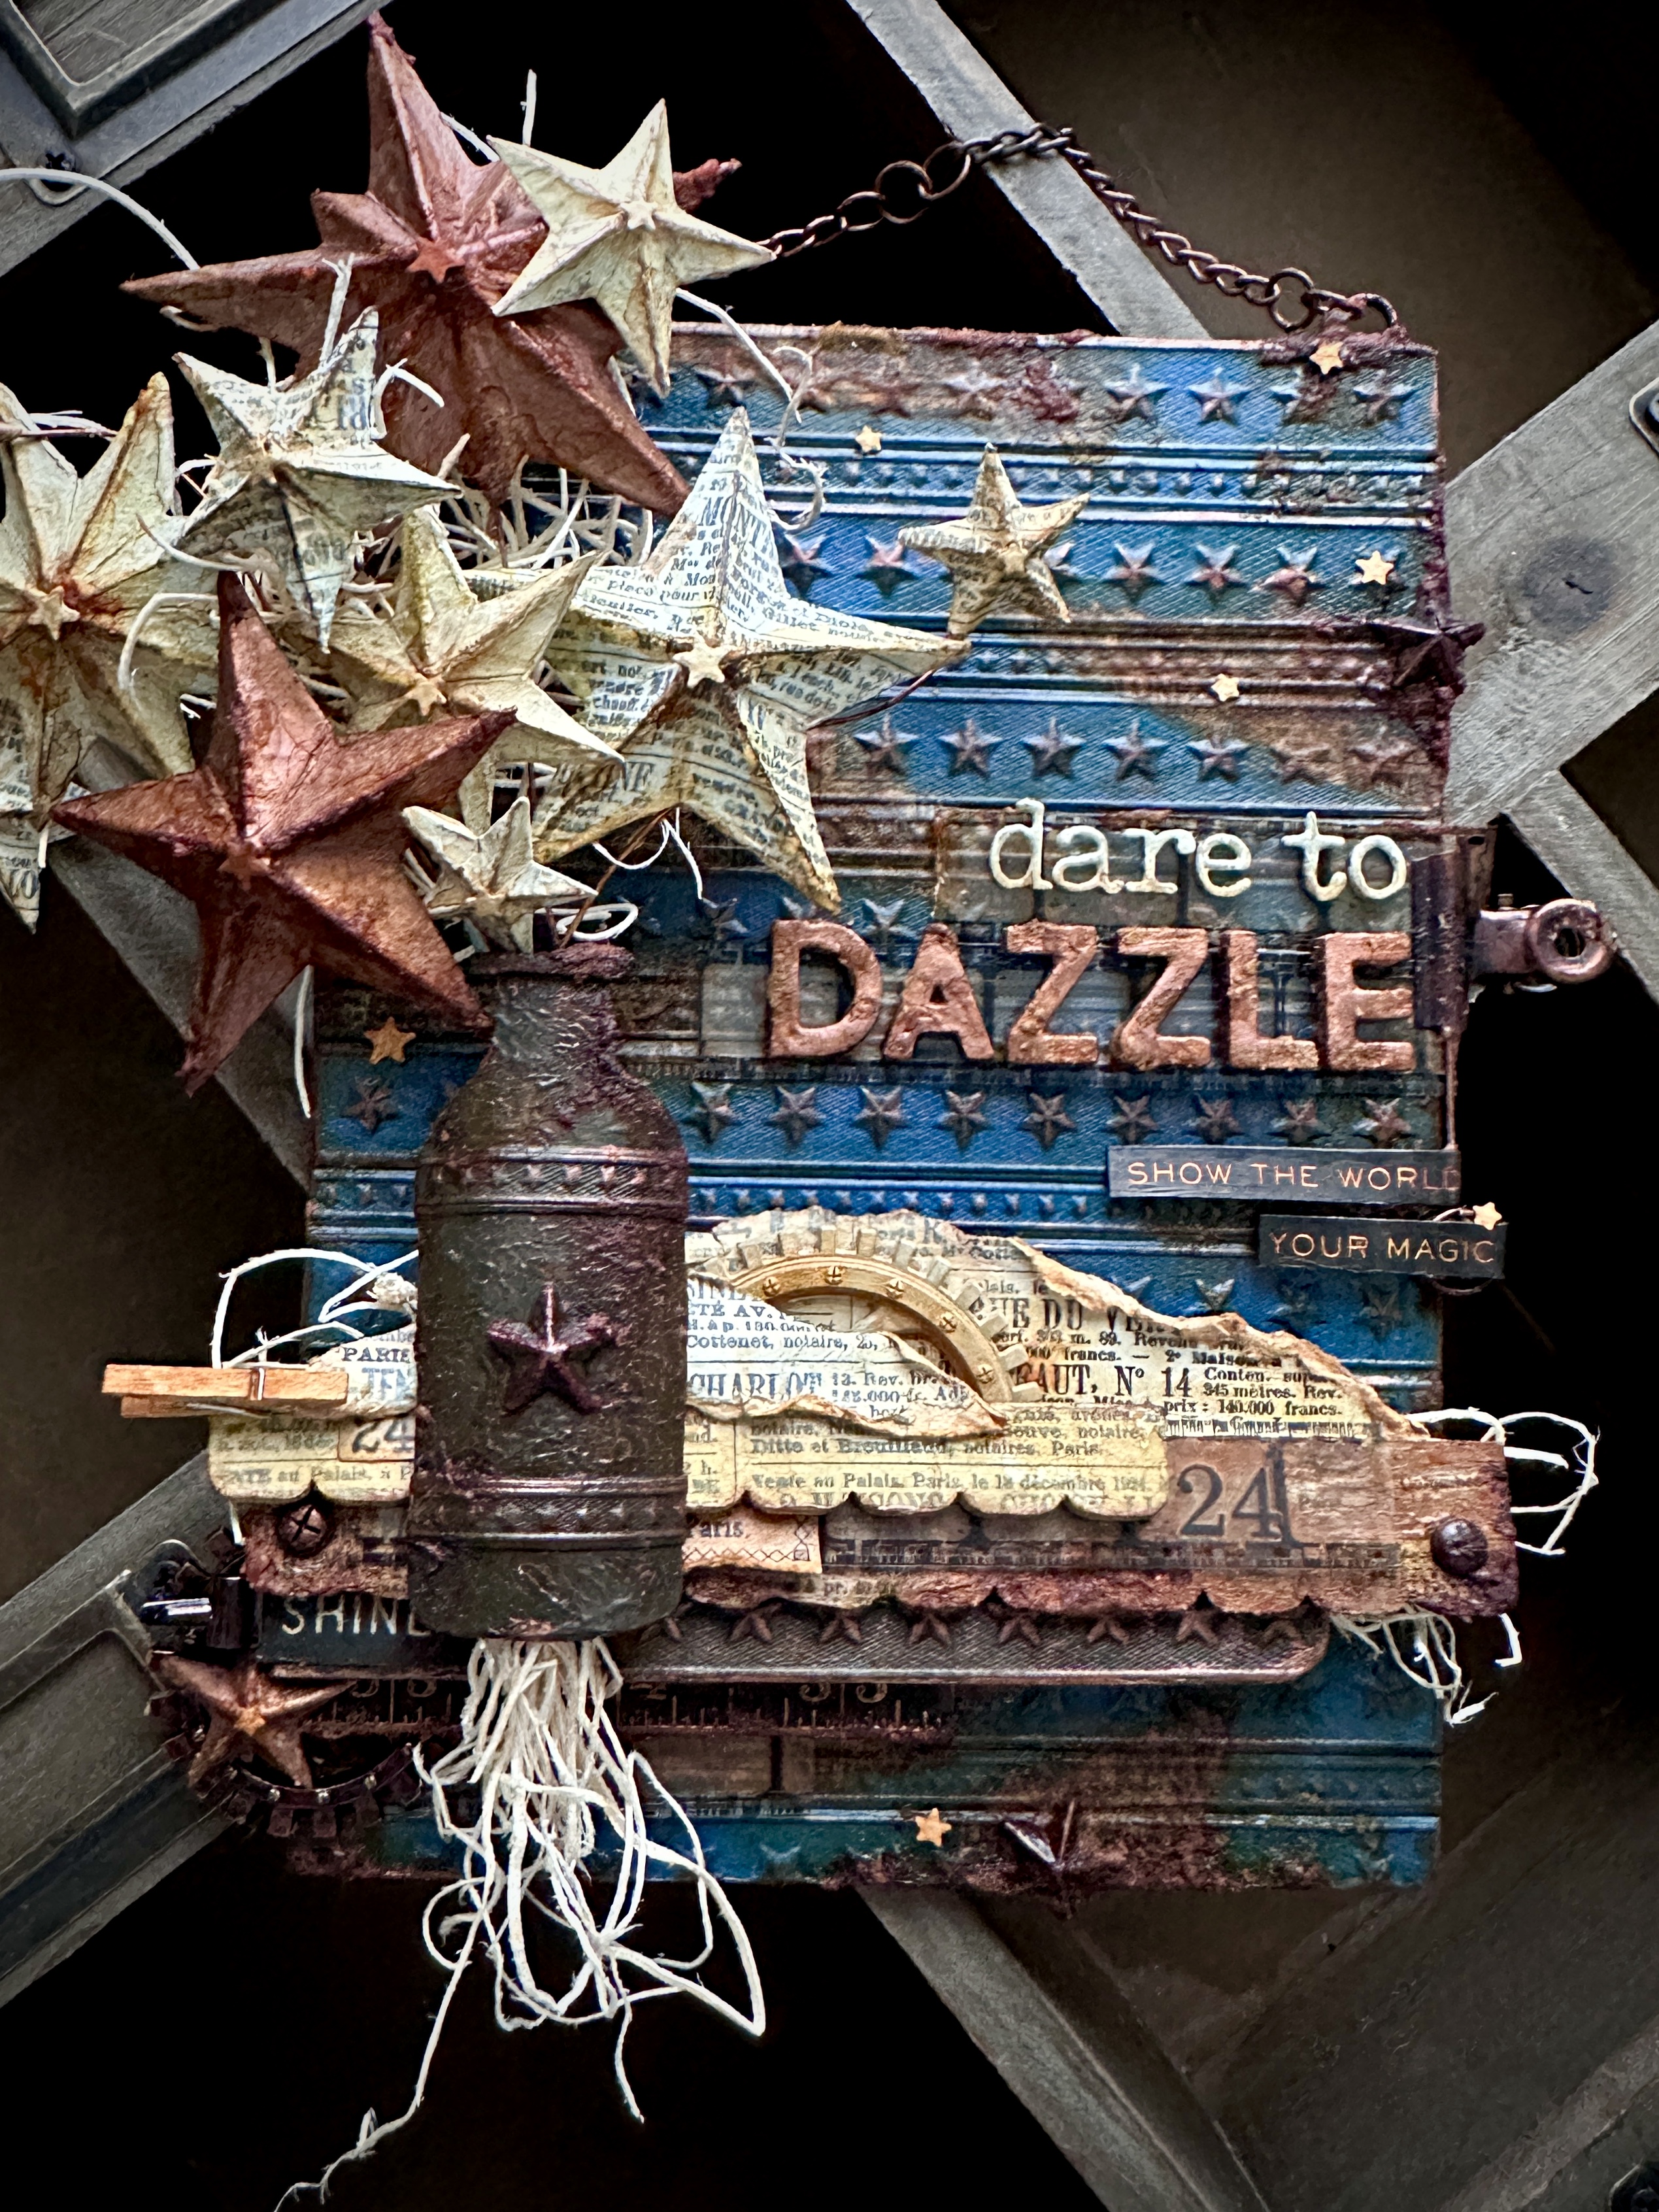
The Background…
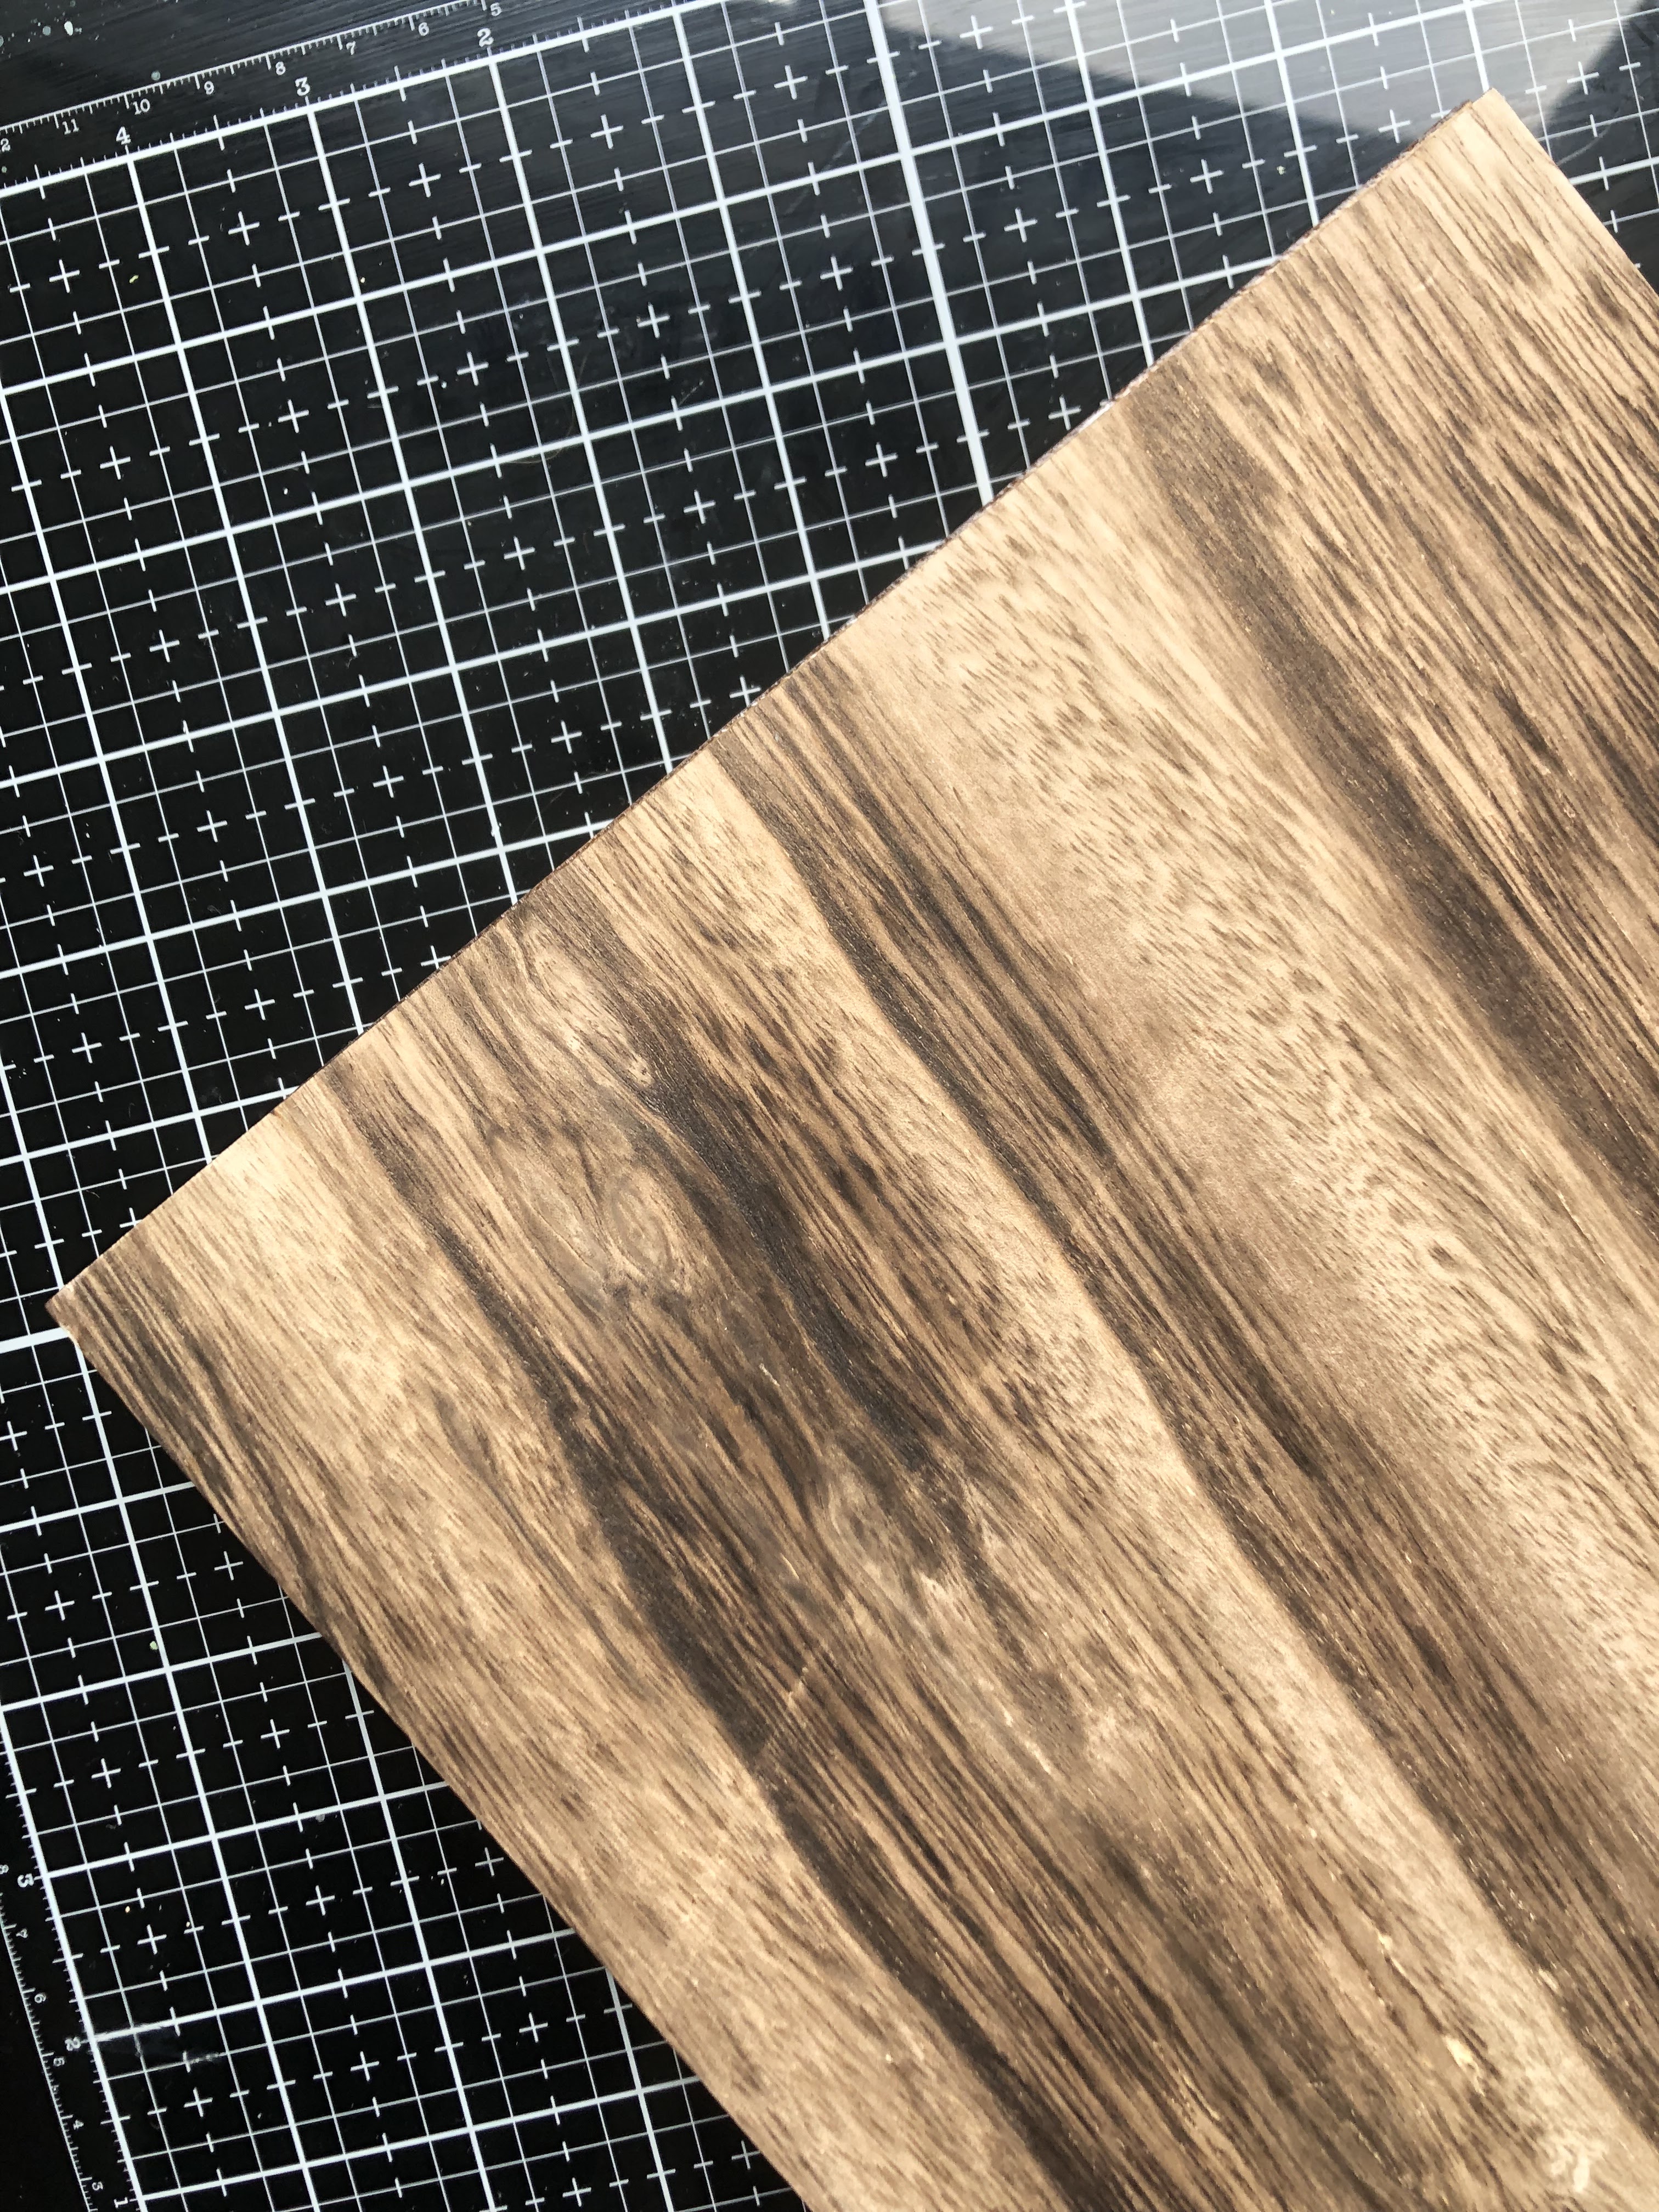
Started by cutting the Star Trim emboss strips from mixed media heavystock paper and gluing on an Etcetera rectangle panel (6x8.5in)

Sanded down the edges with a sanding block and painted with Uncharted Mariner, then more sanding before the wax! Planning the composition…

Next, added Mined wax highlights to the raised texture, stars, panel edges, and heat set. I also used two Caramel-inked screw eyes and chains (sans clasps) to make the hanger on the top edge. Tore up bits of collage newspaper to start adding some grunginess

Covered the collage paper bits, corners and random edges with grit paste, followed by Caramel ink

The Bottle…
Cut 2 chipboard pieces from the Bigz Bottled up die, glued the layers together and added the bottle details to the front (extra piece on bottle mouth, Star Trim and a metal Ideaology star for the center).
First painted with Antique Linen, but decided to go darker 🤷🏻♀️ so re-painted with Scorched Timber, followed by Mined wax highlights, grit paste and caramel ink


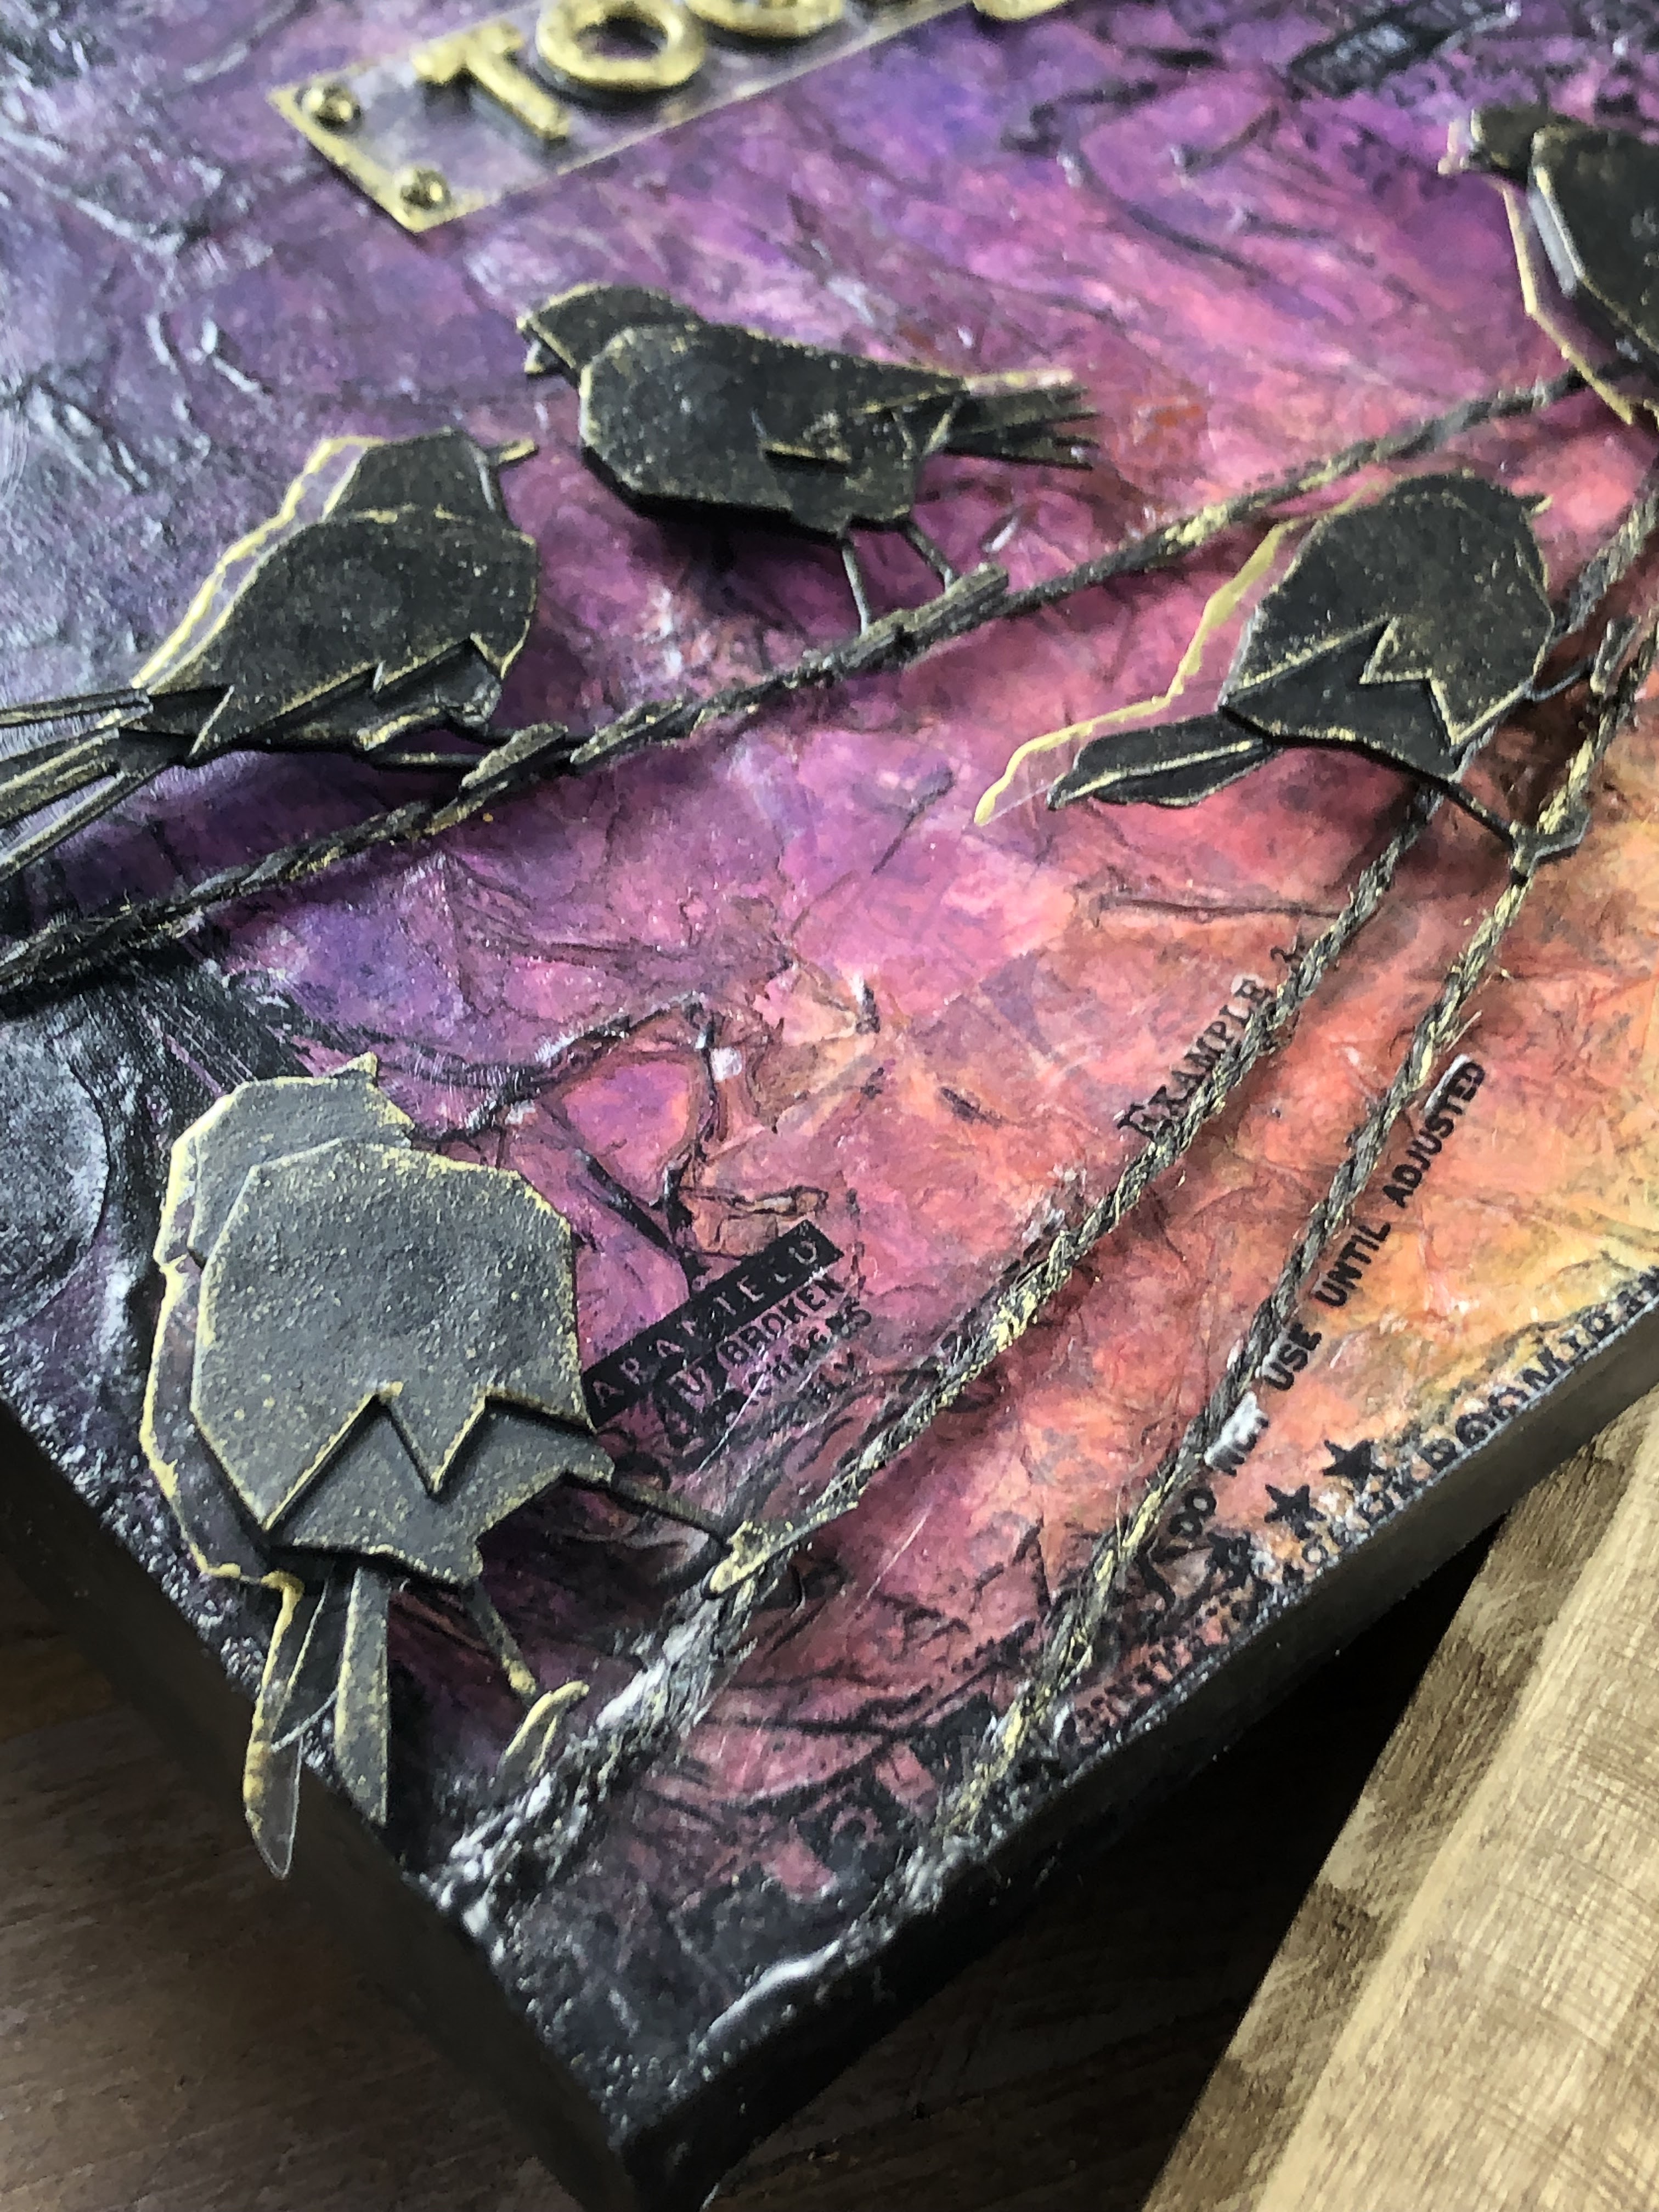
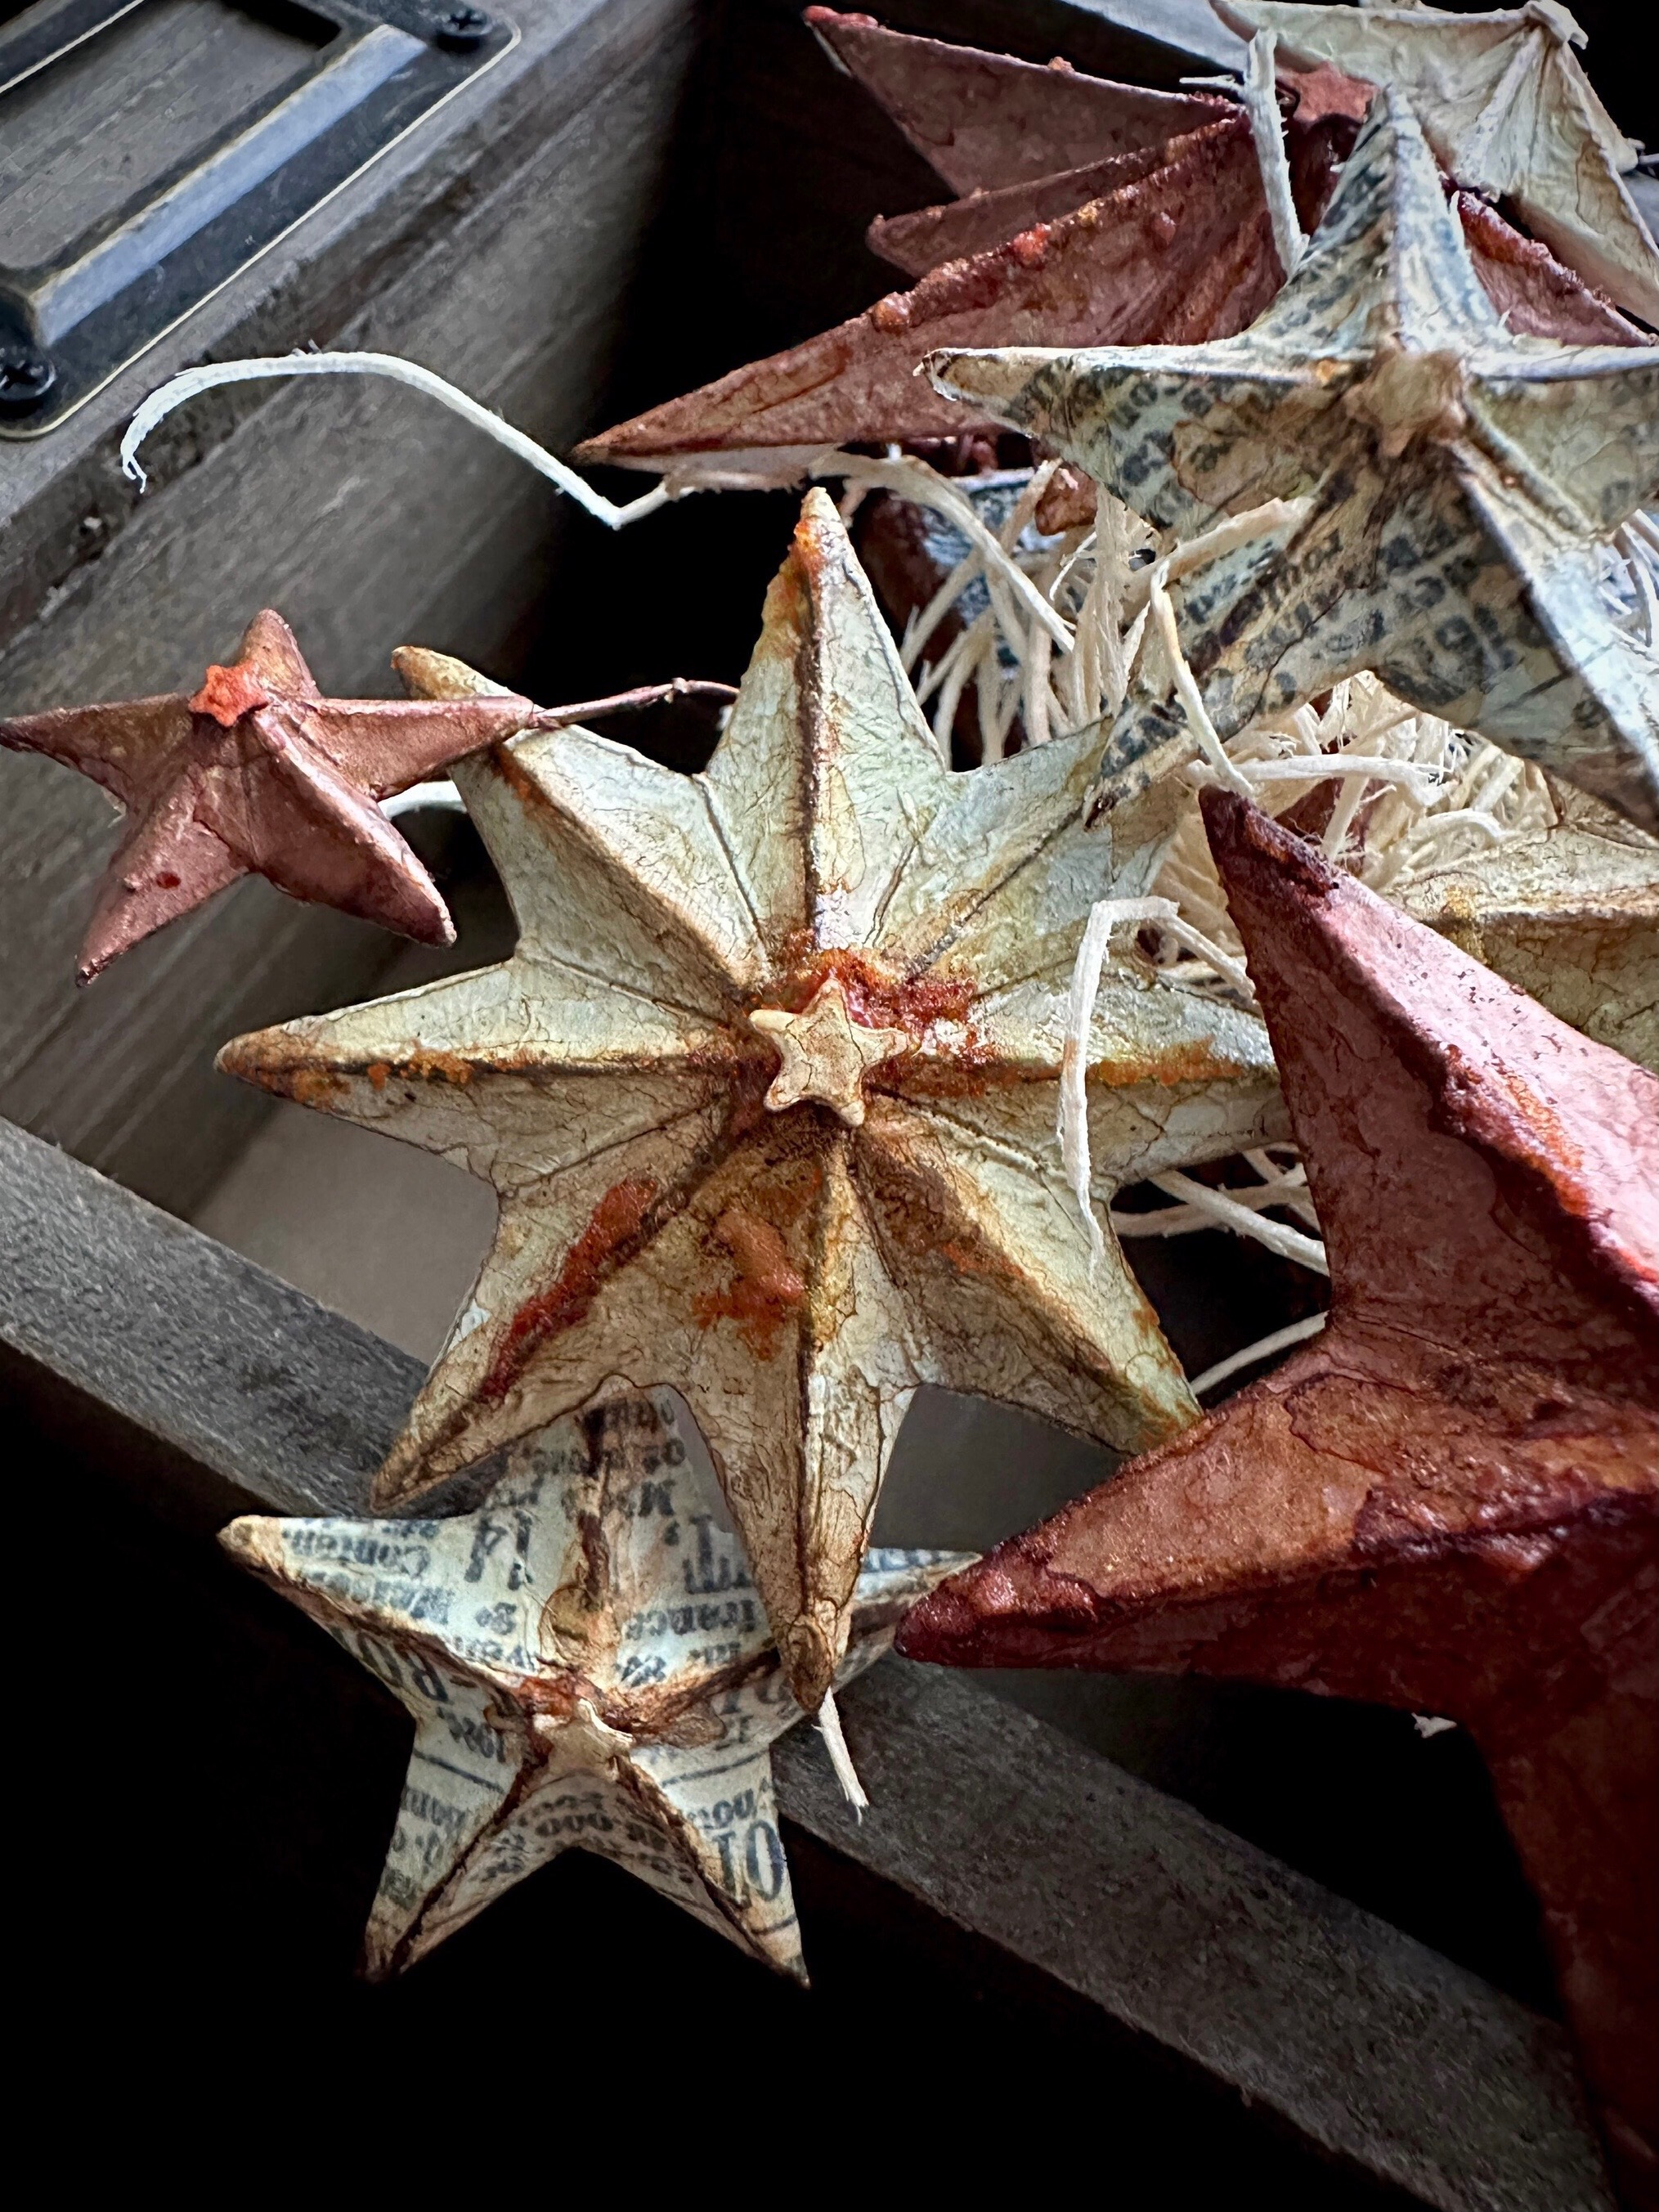
The Stars…
Cut 10-12 stars of all sizes from the Dimension Stars set and folded up. Covered some stars with Mined wax, some with collage paper, some Antique Linen paint… added grit paste, a Caramel-ink wash, and wire pieces down the middle of each


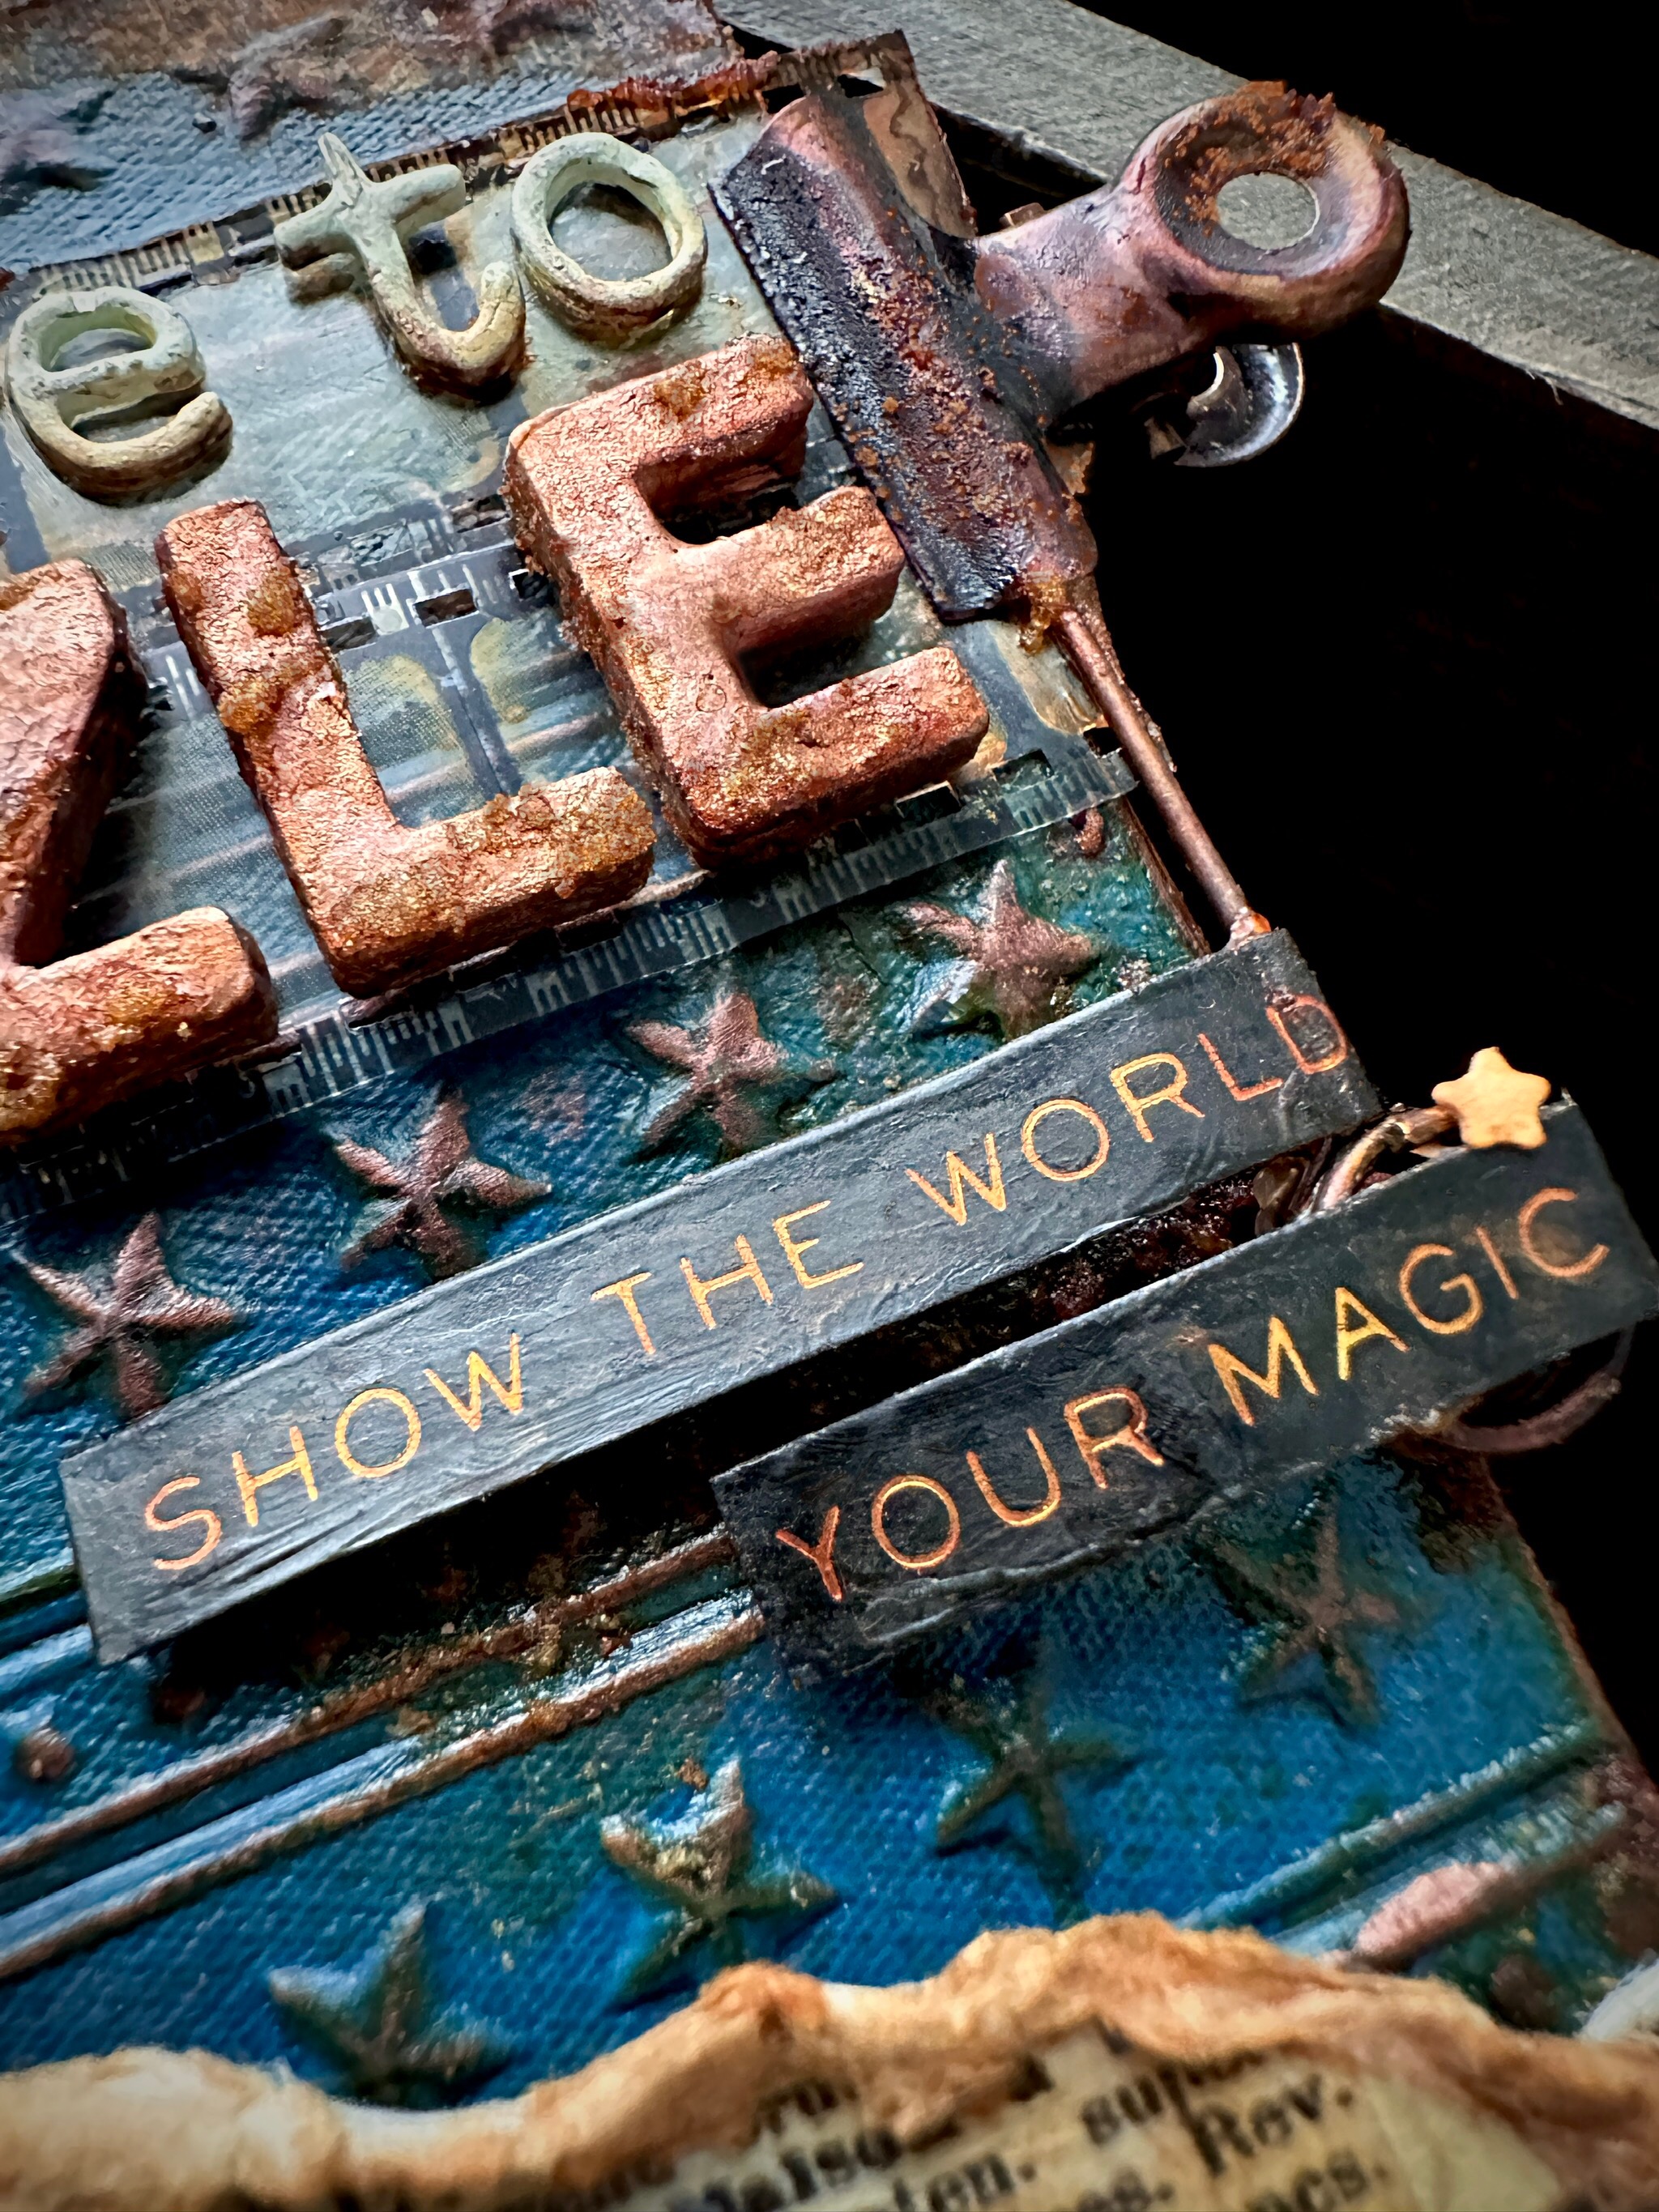
The Sentiment…
Cut “Dare to” letters from the Tiny Type Lower font out of heavystock paper. Cut DAZZLE from the Alpha Bold set (wanted these super thick so cut 6 sets of each letter and glued together)


Covered with Mixed wax, heat set, then added splotchy grit paste

Added Caramel ink on top and glued the letters on pieces of film strip

Used a Caramel-inked large hinge clip to hold the strips. Added the black clipping stickers (from the Metallic sticker book) to an inked memo pin and tucked in the side of the clip
The Finishing Touches…
Lots of other little bobs and bits in the ledge layers… gritty scalloped trim pieces, metal ruler, gears, film strip, clothespin, etc…


Added more excelsior shavings in a few spots, along with more grit paste and Caramel ink in random places + those teeny-tiny stars for extra sparkle ✨
Also added a few “Paris” and “24” little Easter eggs 😍

And THAT is my razzle-dazzle project, thanks so much for looking!
And go Team USA LA28! 🇺🇸☺️
Happy crafting!
x Erin
- - - - - - - - - - - - - - - - -
The Products…
Dies… Bigz Bottled Up, Dimensional stars, Decorative Trims, Alphanumeric Tiny Type Lower, Alphanumeric Bold
Embossing folders… Star Trim Impresslits
Surfaces… mixed media heavystock paper, rectangle chipboard panel, chipboard sheets, chipboard trim
Mediums… collage matte, grit paste translucent
Ideaology… clasp chains, screw eyes, collage paper sheets, metal ruler, metal stars, gears, mini clothespin, mini hinge clip, film reel, large hinge clip, hardware heads, Memo Pin, large gear, Metallic Sticker book
Alcohol ink… Caramel
Foundry Wax… Mined
Distress Paint… Scorched Timber, Antique Linen, Uncharted Mariner
Other… flexible wire, excelsior (wood shavings)