Showing posts with label crackle. Show all posts

Wednesday, December 4, 2024

Noel Deer ornament 🦌

Hello hello! Hope you’re staying cozy (and crafty!) on these chilly days 🥶 Sharing a little wintery ‘cloche’ ornament I created, packed with crackly Tim Holtz goodness 🤤 


Was feeling in the groove on this one and didn't capture a ton of my process, but here's a few random snaps along the way ⤵️ Hope you like it!


Not me crafting while the kids watch Bluey! Win-win I say 🥰


Adding washi tape to the edges to hide the inner layers


Here's what the "final" edges (kind of) look like...


Obsessed that it's see-through… my vision came to life! 


And that's that on that!


Thanks so much for checking out my project! Get in touch if you're curious about anything specific, always love hearing from this wonderful community!

Happy crafting!

xErin

———————

Tim Holtz products used…

Dies... Birch Trees, Darling Deer, Tiny Type Lower, mini snowflakes, Village Christmastime (mini wreath)

Surfaces... Heavystock paper, arched baseboard frames (x2), Bracket Trim pieces (x3), clear acetate sheet, medium thickboard tag reinforcer (for the top of the cloche)

Mediums... Rock Candy clear crackle, collage medium, 

Distress Paint... Walnut Stain (bracket trim + top circle), Antique Linen (trees), Rustic Wilderness (wreath), Speckled Egg (frames), Vintage Photo (deer)

Other Distress... Walnut Stain crayon, clear embossing ink, white embossing powder

Ideaology... mini hardware heads, washi tape, clear snowflakes, icicles

Tools... Big Shot, glass mat, heat gun, blending brush

Random bits... cheesecloth for the snow, twine for the hanger


Monday, October 28, 2024

Fall At Last framed hanger 🍂

Hi again! I’m always so happy for fall every year — school’s back, the weather is gorgy-porgy after the summer heat, it’s football time again — so I thought I’d create a crackly little fall decor piece, inspired by the leaves and pumpkins in my area these days 🍁 the best!


Let me take you through a few more details about how I created this hanger ⤵️


The Background…

Started with a mini framed panel, Ran mixed media heavystock through the Cracked 3D embossing folder, glued down on the panel and painted with Scorched Timber


Next, used Antiqued Linen paint to go over the raised texture with my finger, followed by a thin watery wash of Caramel alcohol ink


Also cut a few embossed strips for the sides of the panel


 For the top hanger, I assembled a few jump rings, hook chains (minus the hooks) and screw eyes
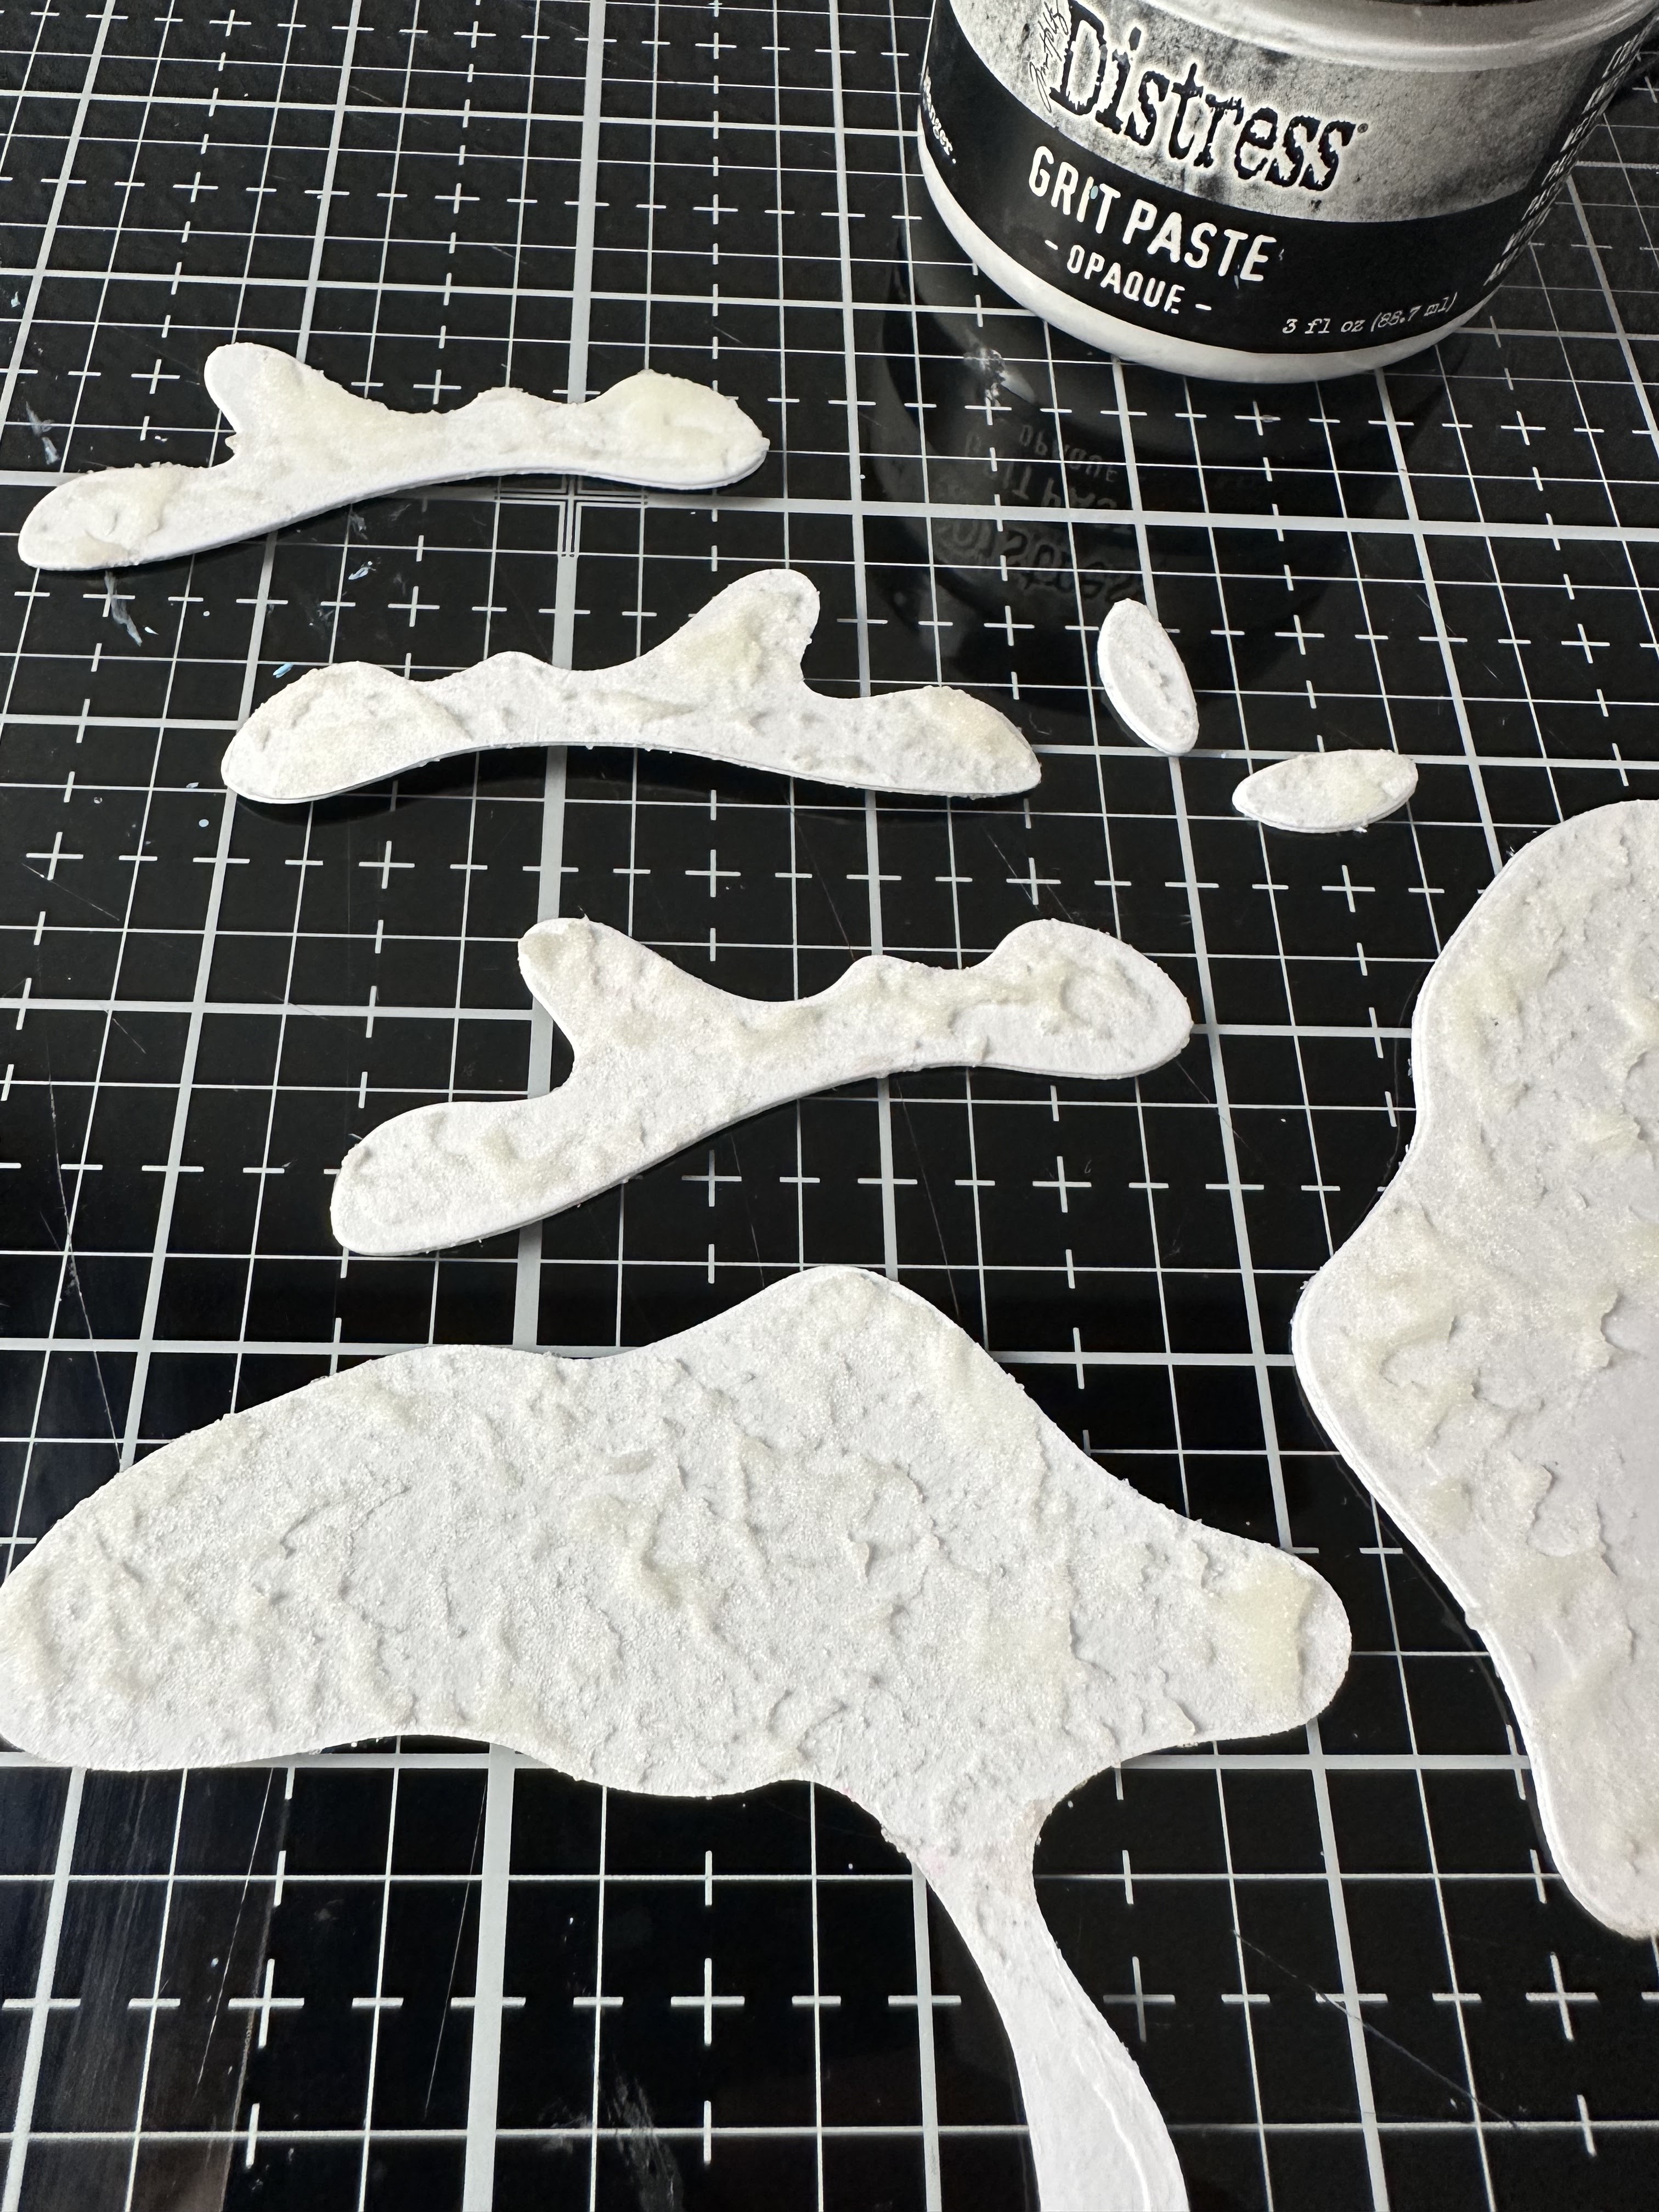


The Pumpkins…

Cut from the colorize Pumpkin Duo, glued all layers together and painted with Antique linen + Scorched Timber stems


Added a top coat of clear crackle, then once it was dry, I rubbed on some scorched timber and rusty hinge distress crayon into the cracks and layer grooves
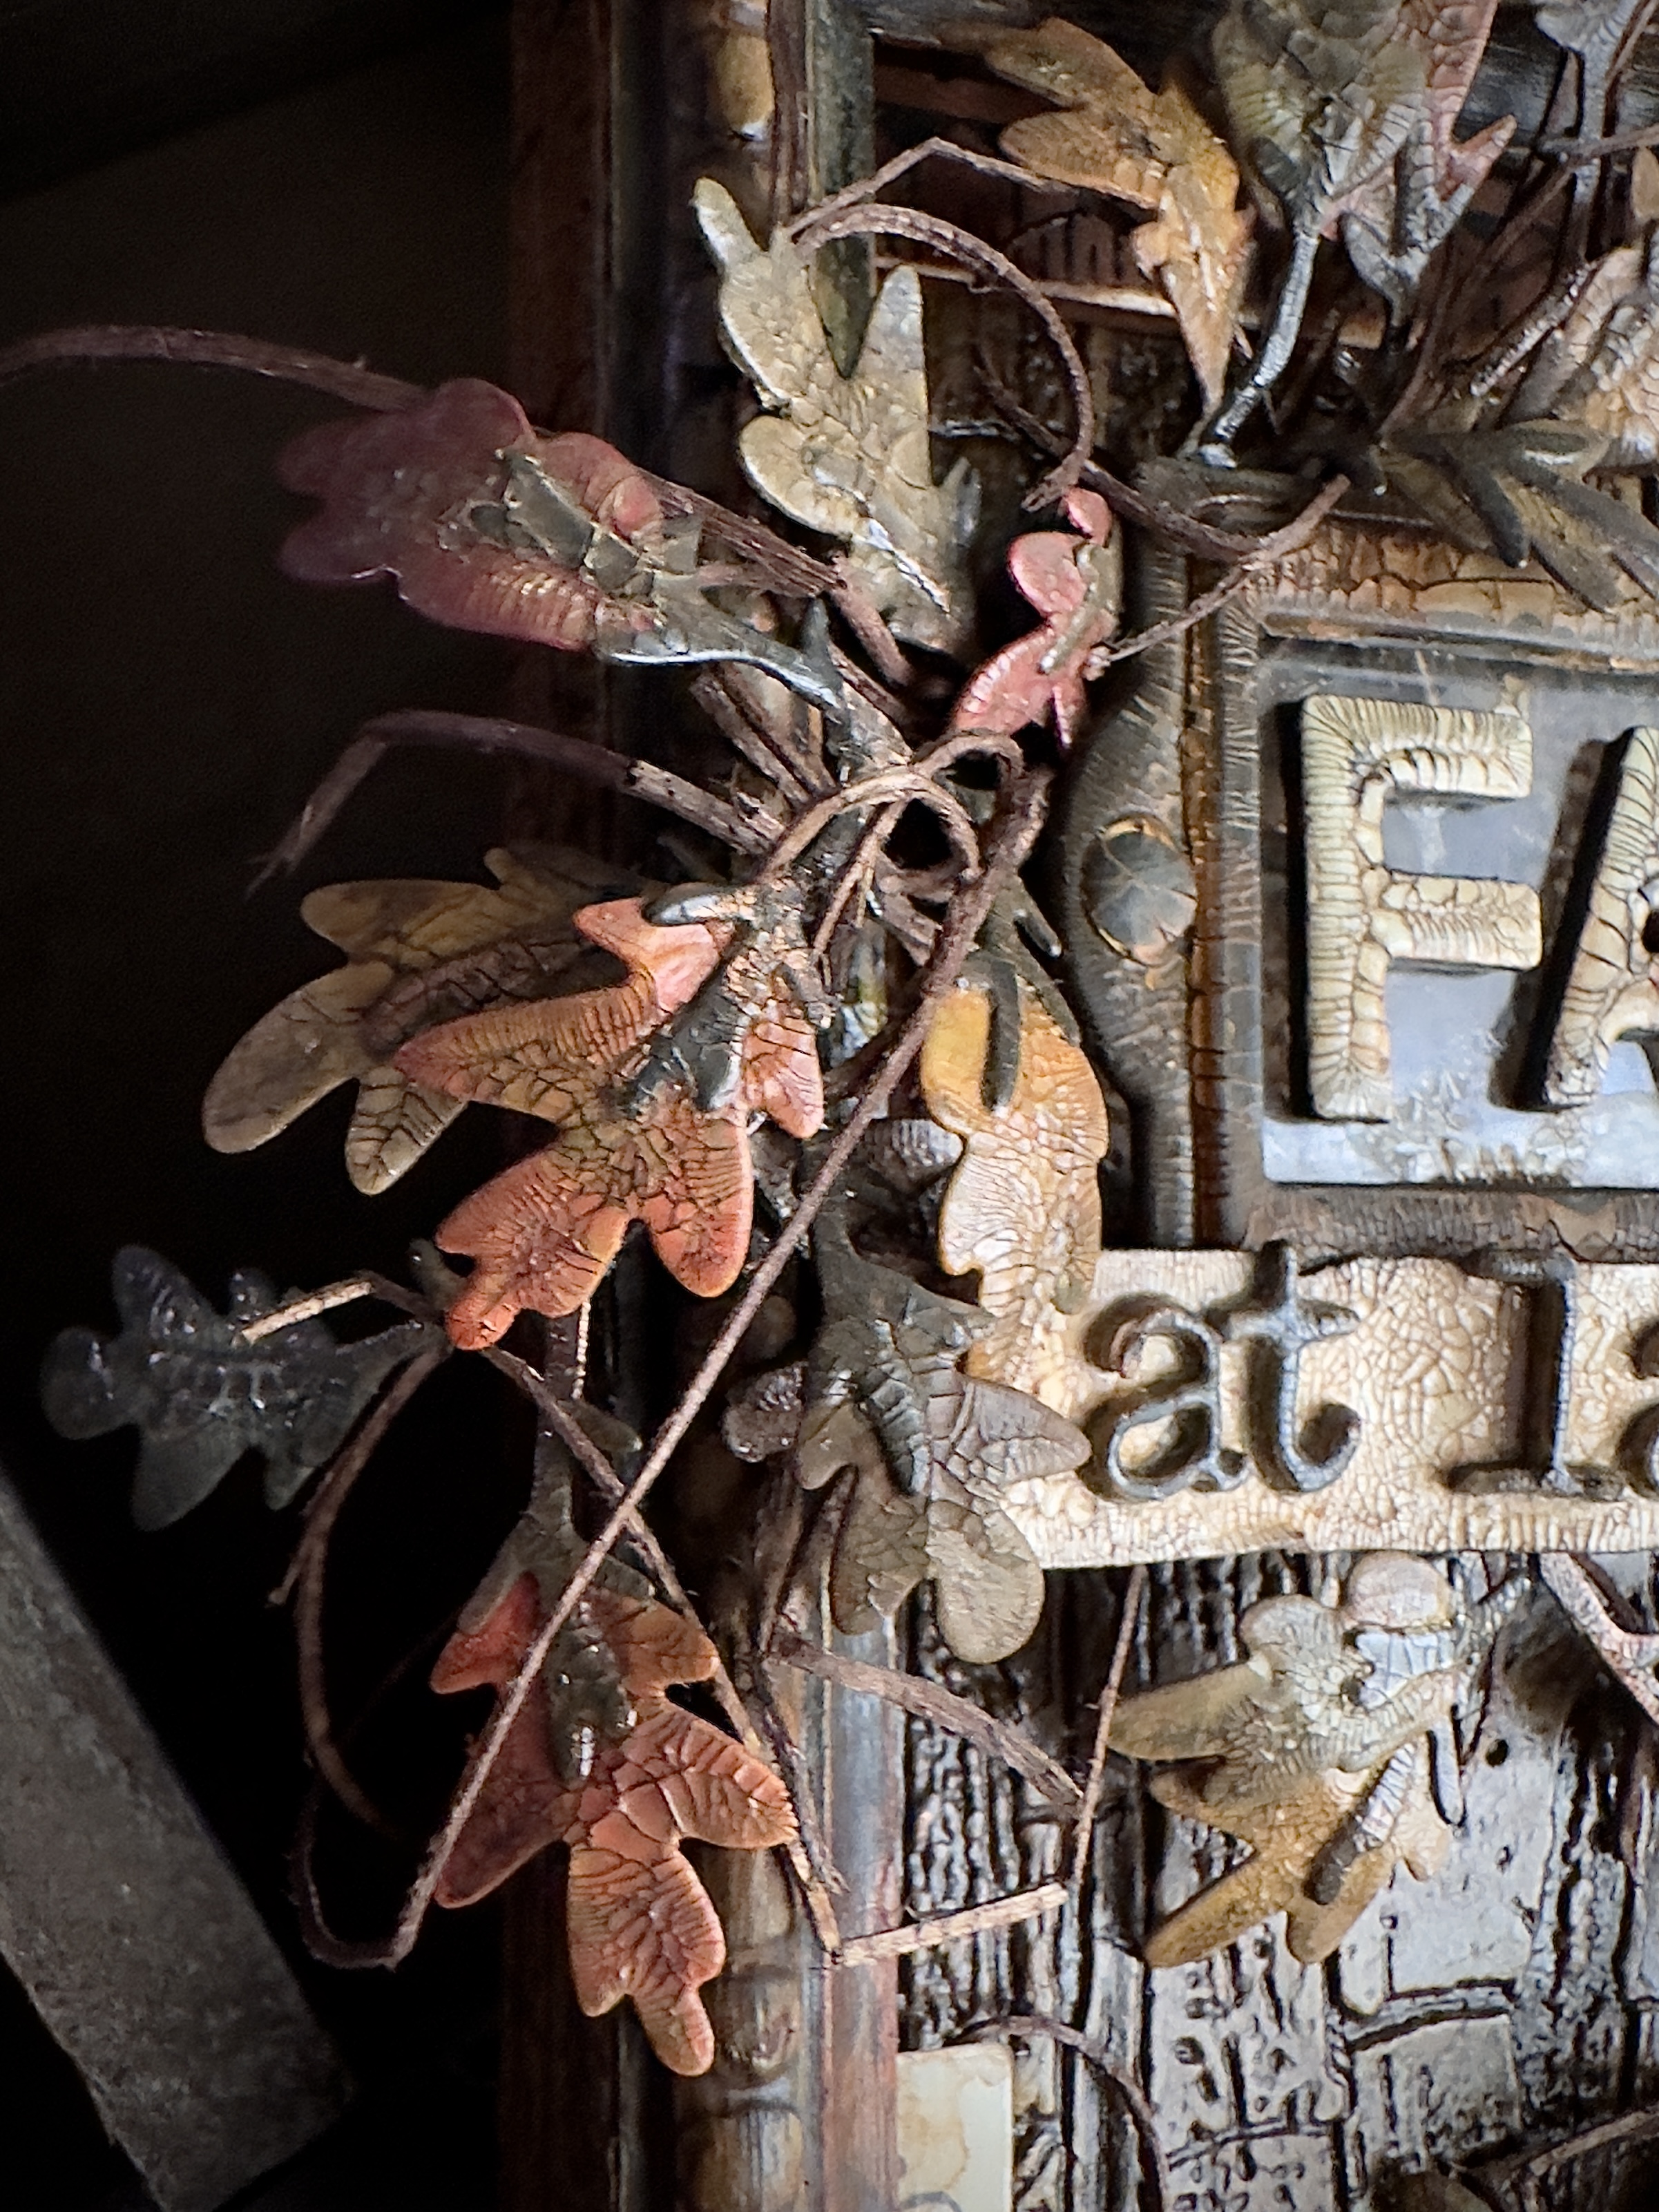

The Leaves…

Cut a bunch of leaves from the Funky Foliage die set

Painted branches with scorched timber, leaves with different reds and oranges and greens (Forest Moss, Rustic Wilderness)


Glued the leaves on the branches and coated all with clear crackle

Once dry, added Scorched Timber crayon on top with a brush, then wiped away the extra with a paper towel


The “FALL” Frame + “At Last” Banner…

Painted the small Ideaology frame (I forget what set this is from) with scorched timber to match the rest, then caramel ink

Next, I added mounting dots before cutting a piece of clear acetate to size and gluing behind the frame


Then coated with clear crackle…


Cut FALL letters from the Bold die set, painted with Antiqued Linen, then a coat of clear crackle, then scorched timber crayon, wipe away extra, painted letter edges with scorched timber to give extra definition

The banner is from the Tattered Banners set (folded on the one side to shorten it up), painted with Antique linen and Scorched Timber edges

The “at last” letters are from the Tiny type lower set, painted with Scorched timber and glued down on the banner, then all coated with a thin layer of clear crackle


The Finishing Touches…

Inked a couple of wooden rulers and added to the top and bottom of my panel

Then glued down the small frame, banner, pumpkins (with leaves) + a few other Ideaology bits before adding excelsior shavings (inked with walnut stain) and tucking in the foliage


Ok, well that is my project, thanks so much for stopping by! Hope you are enjoying this fall season and are able to cozy up with loved ones☺️🧣🍁

Happy crafting! x Erin


The Products…

Surfaces… mini Framed Panel, mixed media heavystock

Dies… Colorize Pumkin Duo, Funky Foliage, Tiny Type lower, Alphanumeric Bold, Tattered Banners

3D Embossing Folders… Cracked

Distress Mediums… rock Candy clear crackle, collage matte 

Distress Paint… Scorched Timber, Antiqued Linen, Forest Moss, Rustic Wilderness

Distress Crayon… Scorched Timber, Rusty Hinge

Alcohol Ink… Caramel

Ideaology… small frame, mini key, eye hooks + chains, hardware heads, clock face, flare pin

Other… mounting dots, excelsior shavings, Big Shot, glass mat, heat gun

Sunday, July 28, 2024

Beach Vibes ☀️

Hi there! Hope your summer is going swimmingly 🤭 Sharing this fun little hanger featuring the walrus from the Tim Holtz Under the Sea 2 dies. Felt inspired by the warm weather to give him some beachy surroundings!


The Frame…

Started with a baseboard frame and added some paper cuts (from the Mixed Media #5 set)


Tinkering with the composition pre-paint…


Painted with Broken China, then brushed on some Scorched Timber crayon and wiped off so it stayed in the recesses… Added a couple Caramel-inked eyelets to the corners and a piece of wire for a rustic hanger


The Sign…

I cut a few pieces of the large rectangle from the Specimen set for the main sign piece. Then used the Woodgrain folder to emboss one of the rectangles + a bit of Mixed Media scrap paper for the sign post… Also used a few pieces of scrap chipboard risers as reinforcers for my sign post


Next, I cut the Alphanumeric Labels letters, glued on the sign base. Painted all with Walnut Stain paint, then rubbed Antiqued Bronze paint over all of the raised texture and letters with my finger. I added tiny Caramel-inked hardware heads to the corners and also dulled some of the Antiqued Bronze with the same caramel ink. Stuck in the little ‘Contagious’ clipping sticker last minute 💡 my fave detail ✨


The Sun…

Cut the sun pieces from the Labels set… Painted with Fossilized Amber, Rusty Hinge, and Crackling Campfire. Followed by a coat of clear crackle and Scorched Timber crayon. The “Community Fun” button is from the Vintage Flair Ideaology set + a Caramel-inked clock hand and large hardware head on top… ugh, obsessed with this🔥


The Walrus…

Cut 2 layers of the walrus from the Under the Sea #2 set, glued together and painted with Picked Raspberry… Then coated with clear crackle and Scorched Ember crayon


The Clouds…

Cut some clouds from the Edison set, added grit paste and painted with white and dabs of Broken China


The Sand…

Cut pieces from the Splat set for my sand dunes and added grit paste


Painted with Frayed Burlap + a bit of Caramel ink along the top of a few pieces…


Tucked in some Frayed Burlap-dyed cheese cloth in between my dunes for extra texture and added a ruler from the baseboard layers pack, a gear + a clipping sticker


Quick look at the back side 🍑 after all elements were glued (I’m weirdly always curious about this! 🧐)


That’s all for now—thanks so much for looking and happy crafting! ☺️❤️

x Erin


The Products…

Dies… Under the Sea 2, Specimen, Splat, Labels, Edison, Alphanumeric Labels

Surfaces… Baseboard Frames, Mixed Media Heavystock paper

3D embossing folder… Woodgrain

Distress Paint… Broken China, Frayed Burlap, Seedless Preserves, Picket Fence, Wild Honey, Crackling Campfire, Rusty Hinge, Scorched Timber

Distress Mediums… Collage Matte, Translucent Grit Paste, Clear Crackle

Ideaology… Gear, Clipping Stickers, Baseboard Layers, Mini Hardware Heads, Clock hand, large Hardware head, Vintage Flair

Other… cheese cloth, wire, eyelets, Caramel alcohol ink